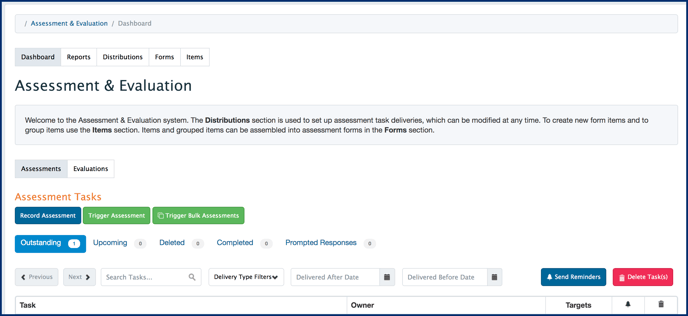
Filters on the A & E Dashboard
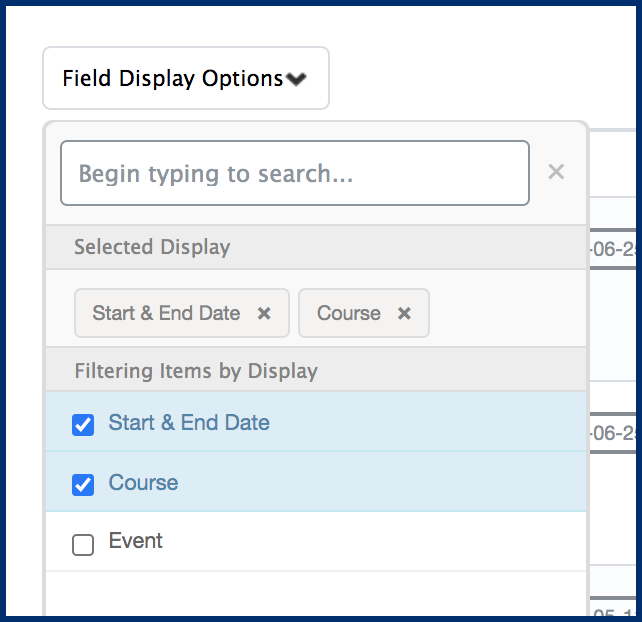
- Start and End Date - represents the start and end date or the relevant task (if defined, e.g., in a distribution or when a task is initiated on-demand).
- Course - the course a task is tied to.
- Event - the event a task is tied to (if applicable).
- Choosing a field will add the appropriate labels to the tasks in the Tasks column.
![]()
CBE Assessment Tools
From the A&E Dashboard, administrators can launch CBE On-Demand Workflows; and can enter completed CBE assessment forms on behalf of assessors.

Record Assessment
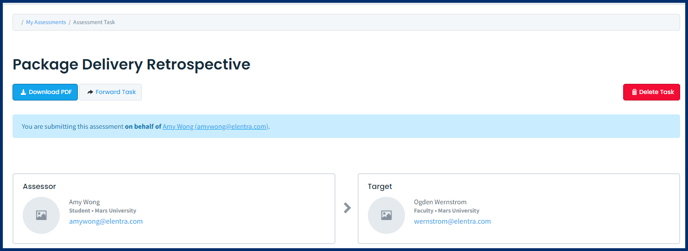
The administrator Record Assessment tool is to be used for forms that a user could initiate on demand (e.g. CBME forms or other assessment workflows). A user cannot record a task using a form that is configured to be sent only via a distribution via this method (you can go into the task via the distribution dashboard and complete it from that view). This allows faculty to complete a pen and paper version of a form and still have the data entered into Elentra. To enter a completed on-demand form on someone's behalf:
Trigger Assessment
Administrative users have the ability to trigger an assessment to send tasks on an as needed basis. This might be useful if a specific learner does not have enough assessments in a specific area or there is a reason to prompt a specific assessor to complete a task on a specific learner.
Step 1: Navigate to the A&E Dashboard. Click on the 'Trigger Assessment' button.
Step 2: Click 'Trigger Assessment'.
Step 3: Complete the following selections:
- Select a learner.
- Select an assessor.
- Define a form type (e.g. CBME or Generic).
- Set a Start and End Date for the Assessment (this defines the period of time the assessment addresses).
- Optionally set the assessment as mandatory. (This means the asessor will not be able to delete the task.)
- Optionally indicate if feedback is required for the assessments. For more information about Form Feedback, see the Knowledge Base article here.
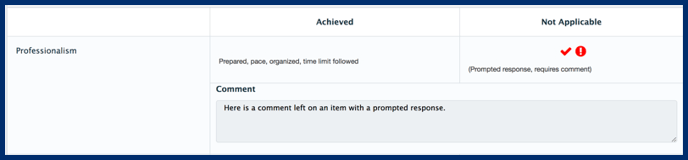
- Optionally set prompted response notifications. For more information on Prompted Responses, see the Knowledge Base article here.
Step 4: Click 'Get Tools'. Search for the appropriate tool as needed.
- You will be prompted to optionally provide an Assessment Cue. This can be a short note to explain the context of the assessment. The text entered will display at the top of a form when the assessor is completing it.
A green success message will display at the top of the page and you will be returned to the beginning of the bulk trigger assessment process to repeat if needed.
Trigger Bulk Assessment
Administrative users have the ability to trigger bulk assessments to send tasks to multiple assessors, for multiple targets, in the combinations required. Forms must be permissioned to specific courses to be triggered using this tool.

Step 1: Navigate to the A&E Dashboard. Click on the 'Trigger Assessment' button.
Step 2: Click 'Trigger Bulk Assessment'.
Step 3: Select a course/program.
Step 4: Select an assessor and target(s) as required. Note that to search for targets you will need to filter by curriculum period. For each target you can set a start and end date to reflect what the assessment period should be.Step 5: To add additional assessors (and targets) click the 'Add Assessor' button.
Step 6: Optionally set the assessments as mandatory.
Step 7: Optionally indicate if feedback is required for the assessments. For more information about Form Feedback, see the Knowledge Base article here.
Step 8: Optionally set prompted response notifications. For more information on Prompted Responses, see the Knowledge Base article here.Step 9: Click 'Tools'. The tools returned will be those that are permissioned to the course/program you selected at the top of the page.
Step 11: You will be prompted to optionally provide an Assessment Cue. This can be a short note to explain the context of the assessment. The text entered will display at the top of a form when the assessor is completing it.
Step 12: Click 'Send Assessment.'
A green success message will display at the top of the page and you will be returned to the beginning of the bulk trigger assessment process to repeat if needed.
![]()

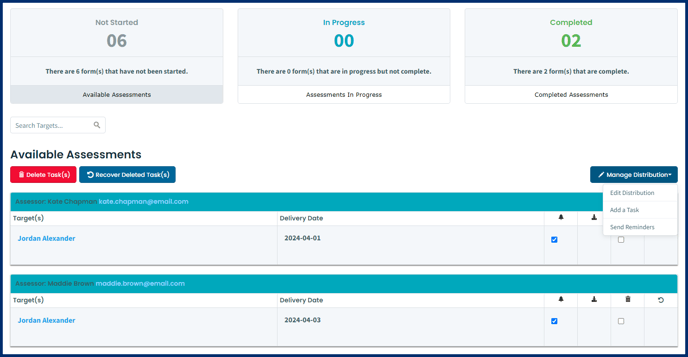
Send Reminders from a Distribution
Viewing Forwarded Tasks in A Distribution Progress Page

Note: You cannot send reminders, nor delete forwarded tasks from the distribution progress page. Instead you would need to do so from the Admin > A & E Dashboard.
Caution: If a task is forwarded more than once, anything beyond the second task will not display on the distribution progress report at all.
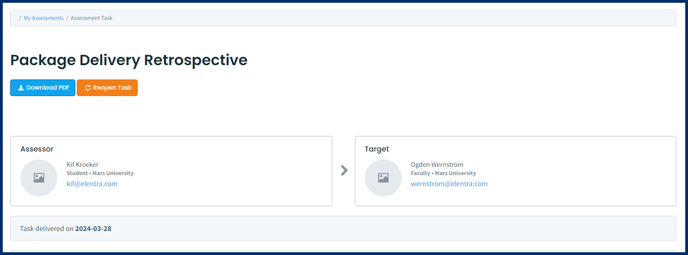
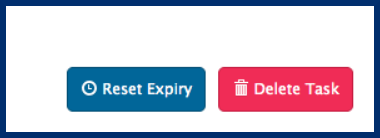
Note: To delete a completed task, it must first be re-opened.
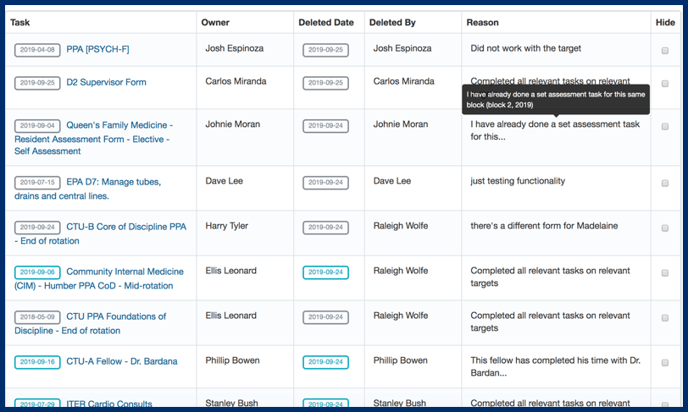
Delete Tasks from the Admin. A & E Dashboard
Delete Tasks from a Distribution
Reopen Deleted Tasks from the Admin. A & E Dashboard
Recover Deleted Tasks in Distributions
![]()