Course Websites

Engage in Elentra communities specific to a course


Article Content

This article covers the following topics. Click on the topic to go to that section of the article.


Introduction

Whenever you add a course to Elentra, you add basic course information to the database and users will be able to see a simple course page for each course. You can optionally create a more robust online course community for learners and faculty by creating a course website using Elentra's Communities Module. The course website will replace the basic course page accessed from the Courses Content tab and functions like an online syllabus.
 
Without a course website in the Communities Module, your learners will view a single page of information, configured by the details on the course's Content tab in the administrator view.
shortformcoursewebsite
 With an Elentra course website many pages can be added to provide additional details:
coursewebsitefull

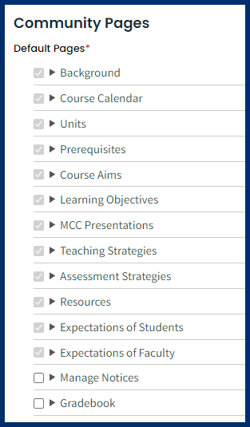
Course websites rely on a templated set of pages (e.g., background, calendar, prerequisites, etc.). The set of templated pages can be configured in Elentra.  Certain pages rely on data from other modules such as the course Calendar, Background, and Learning Objectives pages. Please speak to Elentra Support if you would like to change the default set of pages that get added to a course website. 

Note: You must create a course via Manage Courses before you can create a course community. You then can create the course website for one curriculum period and then from there you roll forward the course website into new curriculum periods. 

Return to Article Content Section Image Beveled v1


Create a Course Website

Do the following to create a course website
Step 1: Navigate to the Communities tab and click Create a Community. Then choose a category to place your new community under such as the Courses, etc. category. 

Note: The list of categories can be configured by the Elentra Team for your instance of Elentra. Please contact Elentra Support if you would like the change the default category options. 

Step 2: Complete the required information for the following sections.
Community Details Section
  • Community Name: This is a mandatory field and will show to community members.
  • Community Keywords: Enter keywords that can be used for searching for the community.  Keywords need to be separated by a comma.
  • Shortname: This will be part of the url and will be automatically generated when you enter the community name.  You can change the shortname before you create the course website, but once it is created you will not be able to edit the shortname and what shows in the course website's url. 
  • Community Type: Select Course Website from the dropdown menu.
  • Community Template: Select the website template you wish to use.  There may only be one option and it may be selected by default.
Community Pages Section
When you select Course Website a list of pages will appear. When the course website is created the selected pages will be visible to users.  Some of the pages will be enabled by default and cannot be unselected and other pages in the list will be selectable. The following image shows an example of default pages pages that are selected by default (pages with a greyed out checked checkbox) and two that are selectable (the Manage Notices & Gradebook pages).  

Course Website List of Default Pages
 
After a course website is created the pages can be managed by the administrators of the course website by navigating to the Admin Centre then clicking on Manage Pages when in the course website.  To edit a particular page click on a page name.
If the page was a preselected default page (pages with a greyed out checked checkbox) when the course website was created, then The Page Type, Page Parent, Menu Title, and Page Title of the page will not be able to be edited.  If the page was selectable at the time of the course website's creation then these options will be able to be edited. 

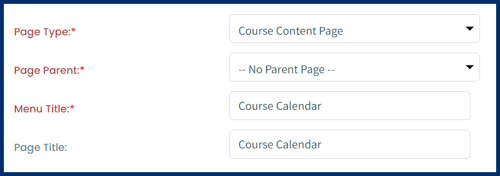
Note: Some of the course content page types rely on the name of the page & menu title in order to be able to pull in information from other parts of the system.  One example of this is the Gradebook page, it must be titled as Gradebook. 

Course Website Edit Page_Page Type, Page Parent, Menu Title, Page Title
 
Community Courses Section
Select the appropriate course for which the course website is being made. If your course does not appear in the drop down list ensure that the course has been created and that a course website does not already exist for this course.  

Note: If a course website has ever been created for a course in any curriculum period it will no longer appear in the list.  If you are wanting to create the course website for a new curriculum period then you will need to rollover the course website to the new curriculum period.  This can be done by navigating to Admin > Manage Communities > Clicking on the cog wheel next to the course's name > select Rollover versions, from here you can create a new course website for the new curriculum period in the course.

 
Course Curriculum Periods Section
Select the appropriate curriculum period for this course website. If only one curriculum period exists for a course, it will automatically be selected.
 
Community Permissions Section
Use these options to control access to the course website. 
 
Step 3: Click Create.
More details can be found on how to create a any type of community in the Create and Manage Communities Knowledge Base article. 
 

Warning: If you get an error saying you must specify a Community Type but don't have the option to do so on the screen, please contact Elentra Support.  It is likely due to a function of creating a second organization in Elentra via the user interface.  Community types are not automatically copied into the new organization. Elentra Support can copy the community types to other organizations in your instance. 

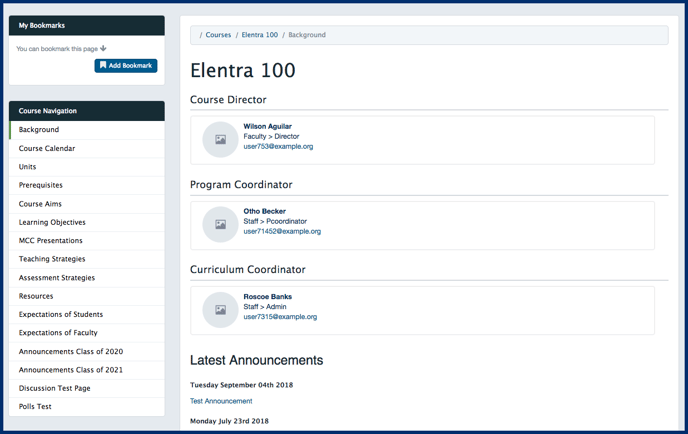
Note: Faculty directors, and curriculum and program coordinators listed in the course contacts section of a course will automatically be made administrators of the course website community with the database setting course_website_associated_faculty_admins.


Learners enrolled in a course will automatically be added to a course website if the setting course_website_autoenroll_audience is enabled.  If it is not then learners will not be automatically added as members of the course and will need to be added manually.

Return to Article Content Section Image Beveled v1


Course Website Template Pages

There are different page types on a course website.  Some can be created after the course website has been created while others cannot. 

Note: The course content page is the page type that cannot be added after a course website has been created and often pulls in information from other parts of the system.  If there is a course content page that you need added after the creation of a course website, please contact Elentra Support. 

To learn more about the other page types please review the knowledge base article Community Page Types.

Detailed below are examples of course website pages that you may be able to include in your course website.  These pages may be labeled as something different in your installation of Elentra as the page titles & menu titles may be editable.  After the creation of a course website you will have the opportunity to add other pages.  The type of pages you can add can be found in the knowledge base article Community Page Types.
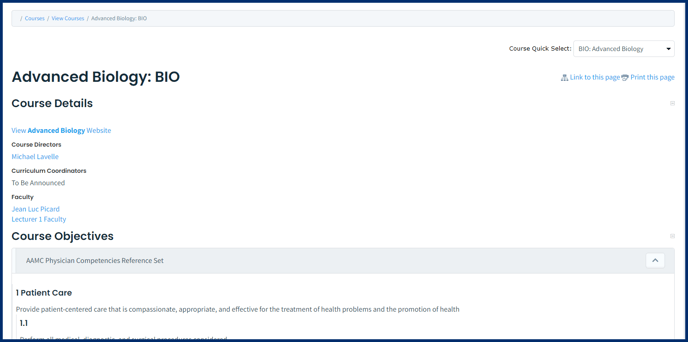
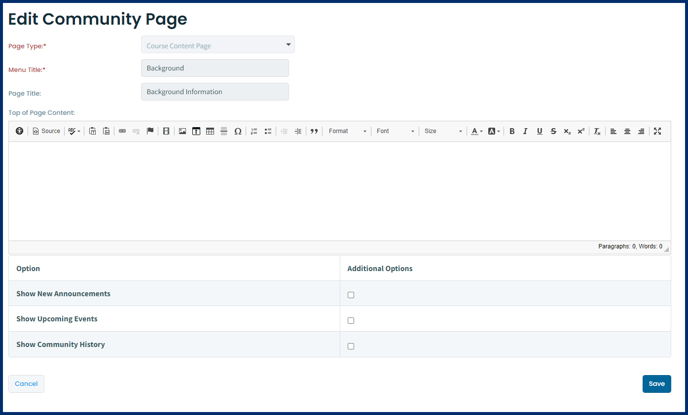
 

Background

Page Type: Course Content

This page pulls in the information from the Course Contacts section of the Setup tab on a course.
  • Add any additional information at the top of the page as needed by editing the page through the Admin Centre > Manage Pages > Click on Background page and using the rich text editor.
  • You can also turn on additional information to populate the page with announcements, upcoming events, and community history (e.g., new members joining).
  • Click Save when done.
Background Page - Course Website
Background Edit Page

Course Calendar

Page Type: Course Content

This page displays learning events scheduled in the course via Manage Events. Learners enrolled in a course will see only the events they are an audience member of instead of all events for a course. You can add customized text to the top of this page through the Admin Centre > Manage Pages > Course Calendar.
Note that users in the community who also have edit abilities in the associated learning events can click on an event, scroll down the page and click Director View/Staff View/Teacher View in the left sidebar and be taken to the event page to edit it if necessary.
Course Calendar Page

Course Calendar Edit Page

Units

Page Type: Course Content
This page will show all existing units for the course and a user can click on a unit name to view the unit details page where the unit details, events, resources, and unit tags are displayed.

Prerequisites

Page Type: Default Content
You can add customized text to this page. Click Save when done.

Course Aims

Page Type: Default Content
You can add customized text to this page. Click Save when done.

Learning Objectives

Page Type: Course Content
By default it displays the curriculum tag sets assigned to the course through the Curriculum Tags tab under Admin > Manage Courses > Curriculum Tags Tab. You can add customized text to the top of this page through the rich text editor. If you add text to the rich text editor, click Save when done.
  • Viewing Contextually Linked Tags on A Course Website:
If you have assigned curriculum tags to a course and contextually linked them to other curriculum tag sets, users will optionally be able to expand each contextually linked objective to see its connections.Contextually Linked Tag On A Course Website
 

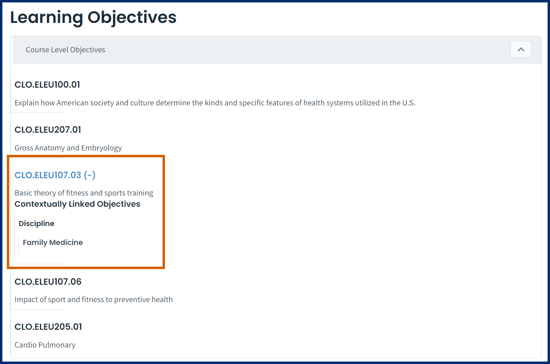
Note: The Learning Objectives page does not display linkages between tags made in Admin > Manage Curriculum.

MCC Presentations

Page Type: Course Content

You can add customized text to the top of this page; by default it displays the Clinical Learning Objectives assigned to the course through the Content tab under Manage Courses. If you add text, click Save when done.

Teaching Strategies

Page Type: Default Content

You can add customized text to this page. Click Save when done.

Assessment Strategies

Page Type: Default Content

You can add customized text to this page. Click Save when done.

Resources

Page Type: Default Content

You can add customized text to the top of this page. If you add text, click Save when done.
If you added resources to a course when you created it via Manage Courses, those resources will not automatically populate this page.

Expectations of Students

Page Type: Default Content

You can add customized text to this page. Click Save when done.

Expectations of Faculty

Page Type: Default Content

You can add customized text to this page. Click Save when done.

Gradebook

Page Type: Course Content

This optional page can be used to provide users with a read-only overview of the gradebook assessments for the course. When gradebook assessments are created administrators, can optionally flag them to be displayed on this page. The information displayed includes the following:
  • Assessment title and description
  • Weight towards the course total
  • Due date (if provided)
  • Grade release date (if provided)
  • Drop box (this provide learners with a link to go to the dropbox assignment)

Manage Notices

Page Type: Course Content

This optional page will provide course contacts like course directors (who are faculty:director users), curriculum coordinators (who are staff:admin users) and program coordinators (who are staff:pcoordinator users) an easy way to send notices to the course audience directly from the course website.
When adding notices from a course website, the audience filter will be preset to the course.
Notices created will still display to learners in the Elentra ME Message Centre on their dashboard. They will not display to learners on the course website.
Return to Article Content Section Image Beveled v1

Edit Course Setup Information from the Course Website

When reviewing a course website, an administrator may notice that some pre-populated information is incorrect. Pre-populated information (e.g., curriculum tags, director's message, etc.) is coming from the course setup information accessed via Admin > Manage Courses.
To quickly access the Admin Courses menu from a course website, look in the left sidebar and click the Edit Course link in the This Community box.
communitytools
Return to Article Content Section Image Beveled v1

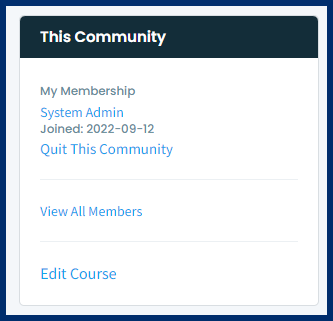
Course Website Options

Administrator Settings

When you build a course website and associate it with a course, some individuals listed on the course contacts page (e.g., course director, curriculum coordinator) will automatically be made administrators of the course website. As admins. they will be able to edit page content, add additional pages, etc.
If you want to grant course website administrator access to Associated Faculty by default (listed on the Course Setup tab), contact Elentra Support to enable this database setting.

Note: Those with Administrator permissions on a community, regardless of their group:role permissions in an organization, can edit pages in the community and control community settings and permissions.

 
Audience Settings 
The audience of a course (set from the Course Enrolment section on a Course Setup page) can automatically be made members of the affiliated course website. Course audience members will display under a separate tab when viewing community members so you can easily distinguish who has joined a course website another way. Even if you have auto-enrolment enabled, remember to make sure that the community permissions you configure for course websites will allow learners to join (i.e., use group registration and set the groups to faculty, staff, and the appropriate cohort of learners). Although learners are listed under the Course Audience tab, they usually still have to click to join a course website and view all content.
Contact Elentra Support if you'd like a course enrolment to automatically be made members of the course website/community. You can turn this feature on or off on a per-course basis through the database. 
By default, learners have the ability to leave a course website community they have been added to or have joined. If you'd like to prevent learners from leaving course website communities, Contact Elentra Support to enable this. If you switch this setting the leave community link will be hidden from course websites so members cannot leave.
 Return to Article Content Section Image Beveled v1