Article Content
This article covers the following topics. Click on the topic to go to that section of the article
- Logbook Overview
- Configure Curriculum Tags to be Loggable
- Course Setup Required to use Logbook
- Learner Use of Logbook
- Logbook Reporting
Logbook Overview
-
Currently Elentra supports setting logbook requirements per course, per curriculum period. There is not currently a way to set up logging requirements per rotation on a rotation schedule. (If an organization has three courses, and each course has its own rotation, just configure a logbook for each course.)
-
Learners view their logbook requirements and completion per course.
-
You can connect the logbook to Clinical Experience> Rotation Schedule so that a learner's logbook deficiency is determined based on how far through a rotation they are. Note that for this deficiency reporting the logbook will apply only the dates of the final booked slot if a learner is booked in multiple slots for a rotation during one curriculum period.
|
Database Setting
|
Use
|
Default Setting
|
|---|---|---|
|
logbook_active
|
Enables the Logbook module
|
ON
|
|
logbook_outstanding_percentage
|
Defines the threshold for level of completion to set 'complete' status in Clinical Experience > Logbook reporting
|
50%
|
|
logbook_log_inactive_rotations
|
Used to control whether or not to allow learners to create logbook entries for courses where their enrolment in the curriculum period has passed.
|
ON
|
|
mobile_logbook_enabled
|
Enables the Logbook module on the mobile app
|
ON
|
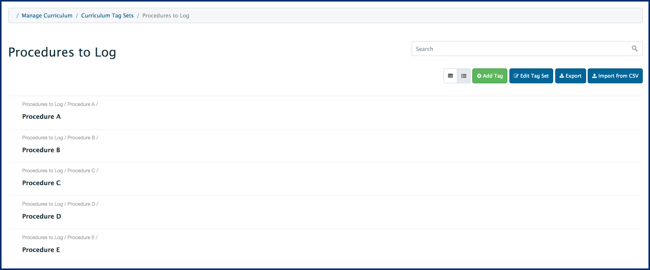
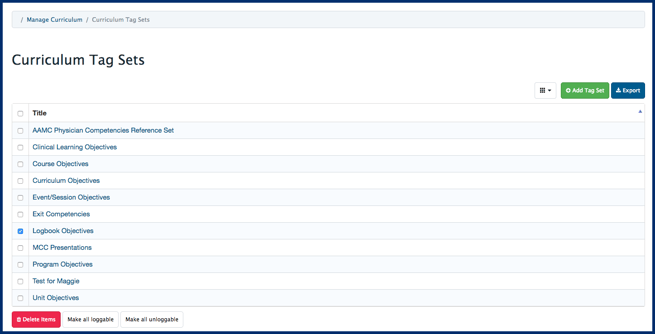
- Tags can individually be made loggable in tag set or you can make all tags loggable in a tag set from the Curriculum Tag Sets page (under Admin > Manage Curriculum > Curriculum Tags). Please see the Curriculum Tag Sets & Tags article for more information about creating curriculum tags.


-
Navigate to Admin > Manage Curriculum.
-
Click Curriculum Tags from the Manage Curriculum card on the left sidebar.
-
Click the checkbox beside the appropriate curriculum tag set.
-
Click Make all loggable below the list of tag set titles.
-
To set all tags within a tag set as not loggable, click Make all unloggable.
- Navigate to Admin>Manage Curriculum.
-
Click Curriculum Tags from the Manage Curriculum card on the left sidebar.
-
Click on the appropriate curriculum tag set.
-
In list view, hover over a curriculum tag and click the pencil icon to edit the tag. In table view, click the pencil icon to edit the tag.
-
Click the checkbox beside This curriculum tag should be loggable in the Experience Logbook.
-
Click Save.
-
Entries includes:
-
the minimum number of times a learner has to log something
-
whether comments are required for a logged entry
-
whether reflection is required for a logged entry
-
whether an observer (e.g., a preceptor) is required for a logged entry
-
whether time tracking is required for a logged entry
-
if you require time tracking you must define a minimum number of hours
-
-
Roles lets you define which options will be available to a learner to record in what capacity they participated in an encounter.
-
Note that it is possible to adjust the list of roles and their descriptions in the database (the table is logbook_lu_roles). You will need help from Elentra Support to do this.
-
-
Environment lets you define the settings a learner can pick from when they log an entry.
-
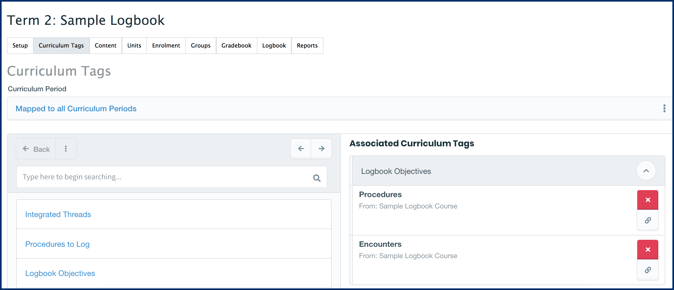
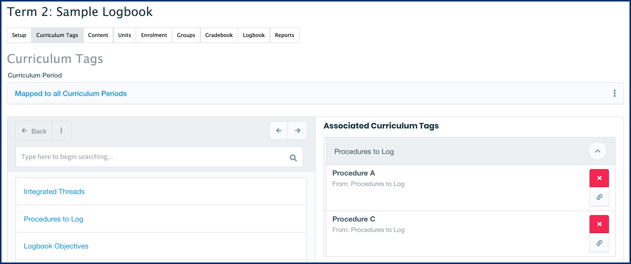
Navigate to Admin> Manage Courses.
-
Click on the name of a course and then the Logbook tab, OR click the menu cog to the right of the course name and select Logbook.
-
Make sure you are working in the correct curriculum period, or switch it if necessary.
-
Click Edit beside any curriculum tag or subset of tags to set the requirements.
-
If working with a hierarchical tag set, click the plus icon on the Overall configuration for <tag set title> to open the overall configuration options. This allows you to apply a default configuration to all tags in a set and then make individual changes as needed.
-
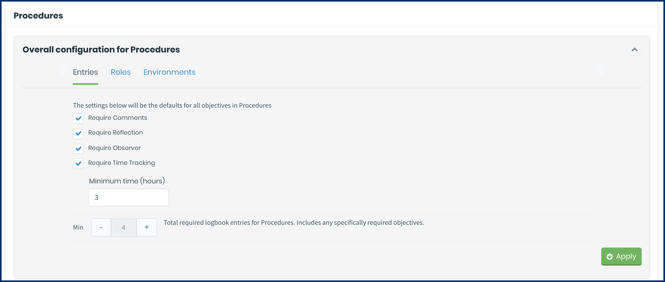
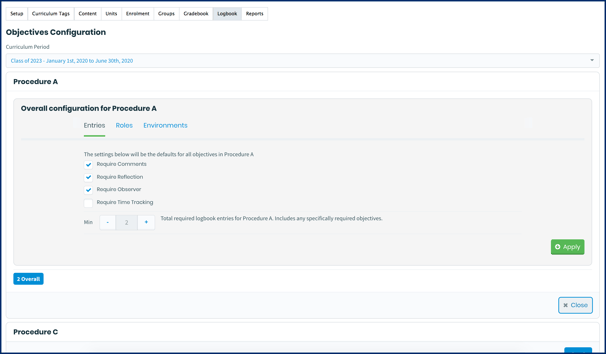
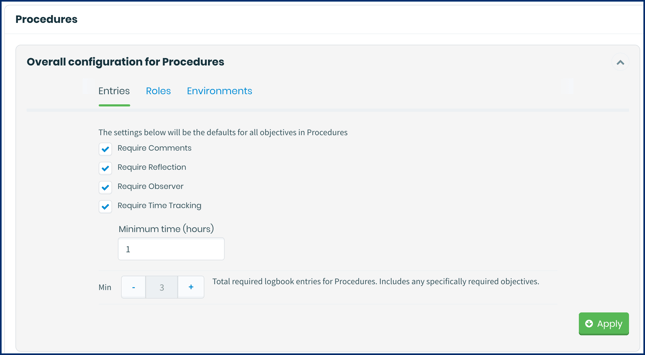
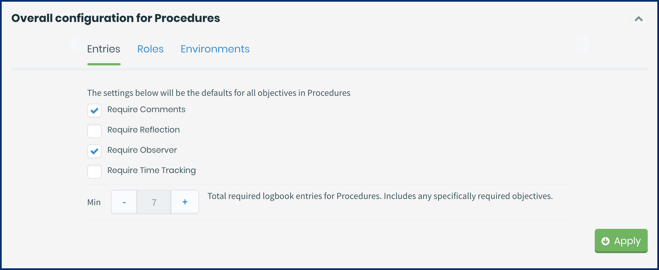
Entries options include:
-
Require Comments: If you check this off, the learner will be required to include comments when they log an entry for this tag.
-
Require Reflection: If you check this off, the learner will be required to include a reflection when they log an entry for this tag.
-
Require Observer: If you check this off, the learner will be required to indicate the name of the person who observed them when they log an entry for this tag. Learners can add an existing Faculty user or add an external preceptor if the user does not already exist in Elentra.
-
Require Time Tracking: If you check this off you can define a minimum number of hours. Learners will have to log a time estimate when they log an entry.
-
Min: Use the plus and minus buttons to indicate if there is a minimum number of encounters required for this tag.
-
If using a hierarchical tag set: The Overall configuration for comments, reflection, observer and time tracking will apply to all included nested tags, however, the Min. set here is for the total number of encounters for the tag subset (i.e., 5 logged encounters across however many tags are included in the subset).
-
-
-
Click Apply. You will see a success message.
-
-
If you are using a hierarchical tag set, the Overall configuration menu will collapse and you can adjust the entry requirements for individual tags as needed (e.g. remove notes requirement from a certain tag, or indicate specific minimum numbers for individual tags).
-
-
To adjust the entry requirements for an individual tag (e.g., to remove the requirement for an observer on a particular tag), make the change on the tag card.
-
Click Apply for each tag when complete. You will get a success message after your change is saved. Close the window by clicking OK.
-
Click Edit beside a tag/tag set.
-
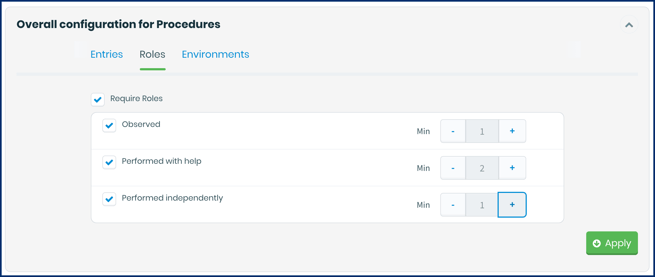
If you are using a hierarchical tag set, click the plus icon beside the tag set name to reopen the Overall configuration menu, then click on Roles to apply a default setting to all tags.
-
-
Check off Require Roles, this will open a list of roles to select from.
-
Check off each role that you want to include for a tag; when you do this you will have the option to set a minimum requirement per role as needed.
-
Click Apply. You will see a success message.
-
-
If you are using a hierarchical tag set, the Overall configuration menu will collapse.
-
-
To adjust the role settings for an individual tag, click on Settings. This will open another menu (you should see your default settings already applied). Adjust the role options and requirements for individual tags as needed.
-
Click Apply for each tag when complete. You will get a success message after your change is saved. Close the window by clicking OK.
-
Click Edit beside a tag/tag set.
-
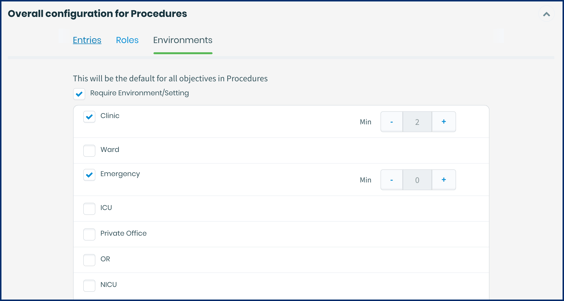
If you are using a hierarchical tag set, click the plus icon beside the tag set name to reopen the Overall configuration menu, then click on Environments to apply a default setting to all tags.
-
-
Check off Require Environment/Settings; this will open a list of environments/settings to select.
-
Check off each environment that you want to include as an option for a tag; when you do this you will have the option to set a minimum required number as needed.
-
Click Apply. You will see a success message.
-
-
If you are using a hierarchical tag set, the Overall configuration menu will collapse.
-
-
To adjust the role settings for an individual tag, click on Settings. This will open another menu; click Environments (you should see your default settings already applied). Adjust the environment options and requirements for individual tags as needed.
-
Click Apply for each tag when complete. You will get a success message after your change is saved. Close the window by clicking OK.

Course Settings

-
If a learner has not yet started a rotation for a particular course, they will not show up as deficient.
-
For current or past rotations, if learners are half way through the rotation but have less than 50% of the logging requirements complete, they will display as deficient. (Note: Contact Elentra support to request a database setting change to adjust the threshold to measure logbook completeness. The database setting is logbook_outstanding_percentage)
-
Note that if a learner is booked into two slots within the same course, the system will take the dates of the second slot to measure completion.
Note: Applying the course setting to use the rotation schedule to determine logbook completion is NOT specific to a curriculum period. If you enable this option, it will apply to all curriculum periods associated with the course.
-
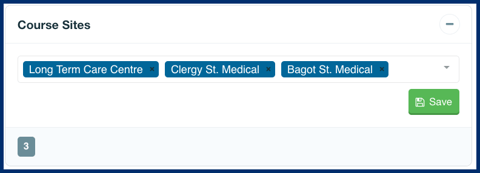
Click anywhere in the Select a site bar.
-
Hover over a site name and click on it or press Enter to add a site to the list.
-
Sites will display in the order added to the Course Sites list.
-
To remove a site from the list click the small x beside the site name.
-
Click Save.
-
You will get a success message.
Note: The Sites list stored with a logbook is not specific to a curriculum period. Therefore, please include all sites that are applicable to all learners in the course (regardless of curriculum period).
A note on communicating logbook requirements with learners: There is no user interface that easily allows learners to see all details of all their logbook requirements across courses in one table. While learners can view how many entries have to be observed, how many have to be in a particular setting, etc. there is not a matrix view that shows them how these configurations interact. For that reason, you may find it useful to provide students with a table that shows them these requirements, especially if you have complicated logbook requirements.
-
Click the user icon in the top right and select Logbook.
-
Click on a course name to switch courses if needed.
-
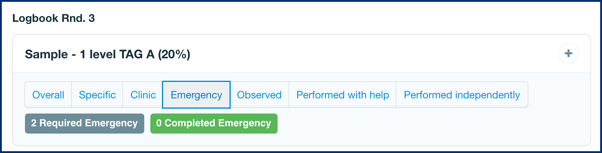
You'll see a list of curriculum tags or tag subsets and an overview of the requirements and your progress towards those requirements (e.g., 60% of required entries in an ER setting).
-
Click on a label (e.g., ER) to view additional details about your logged entries (e.g., 4 Required, 0 Completed).
-
Grey labels show the entries required and green labels show the entries completed.
-
-
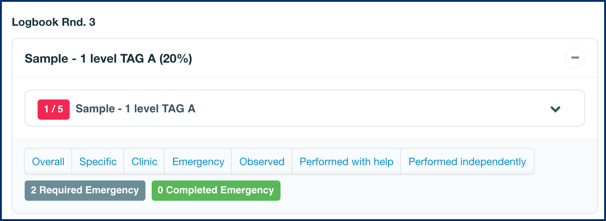
Click the chevron on the right side of a tag subset to view completion details for individual tags.
-
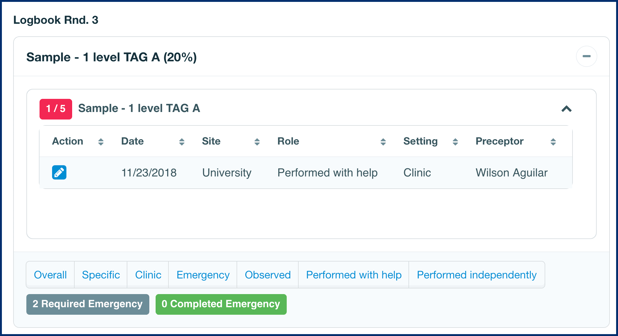
Click the tag name or black chevron beside the tag name to view a list of existing entries.
-
-
From the user icon in the top right, select Logbook.
-
Click Log Entry at the top of the logbook.
-
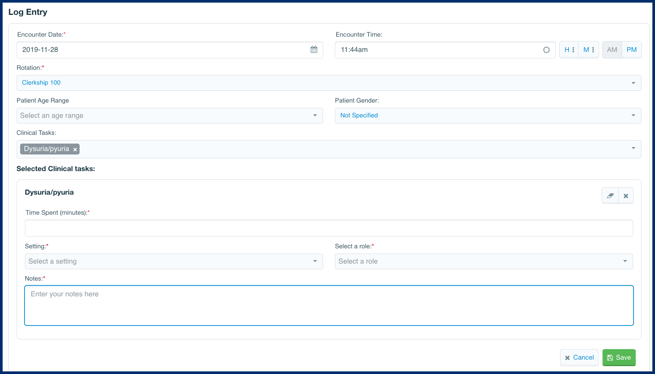
Complete the information, noting the following:
-
Encounter Date: This is required and can be set to before the current date if a learner needs to log a past experience.
-
Encounter Time: This is automatically set to the time when the current time but can be adjusted as needed.
-
Rotation: This will be preset with the course you were looking at but can be adjusted as needed.
-
Clinical Site: Click anywhere in the bar to access a list of available sites, and then click on the appropriate site. (If no sites were configured for the course logbook this option will not appear.)
-
Patient Age Range and Gender: These will appear as default fields on all logging forms and Gender will automatically be Not Specified.
-
Clinical Tasks: This is where the learner can indicate which tags they are logging with this form. Learners can add more than one tag to a form; if they do they will have a place to log the details for each tag.
-
- After you specify a clinical task you will be prompted to enter additional information. What you are required to enter and your options for the different fields has been configured by an administrator.
-
-
If a learner is logging multiple entries on one form, they will see a Global Preceptor option. This allows them to easily apply the same preceptor to all the tags (although they can still change the preceptor on a specific task).
-
Preceptor: This field will appear if an observer is required for this entry. Start typing a name to get a list of people, and then click on the appropriate name.
-
Note that a list of recently used preceptors will display for your convenience.
-
If you need to add an external user (i.e., someone without an Elentra account), click Add external user, Provide first and last name and email address. Click Create.
-
-
-
-
Setting: Click anywhere in the bar to access a list of available settings, and then click on the setting in which you completed this encounter.
-
Role: Click anywhere in the bar to access a list of available roles, and then click on the role that best describes what you did during this encounter.
-
Notes
-
Reflection
-
Time Spent (minutes): This will only display to learners if the loggable encounter was configured to require time. Time is entered in minutes.
-
- You can clear the contents of a form by clicking the eraser icon.
-
-
Users will be asked to confirm their decision. Click OK to confirm.
-
-
To deselect a task and remove it from the logging form click the small x beside the eraser icon.
-
Users will be asked to confirm their decision. Click OK to confirm.
-
-
Click Save. You will get a success message and the entry will be added to your list of logged entries.
-
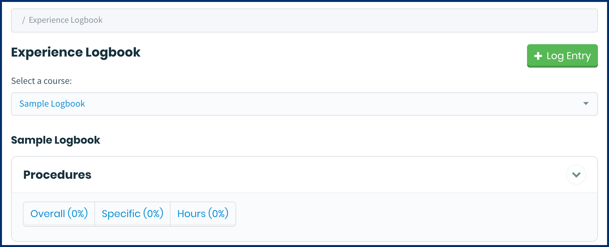
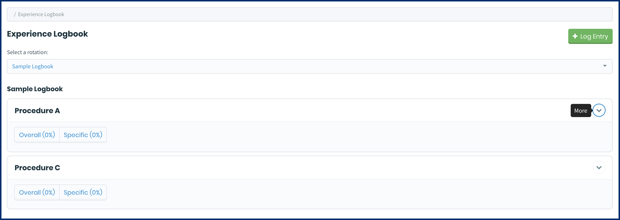
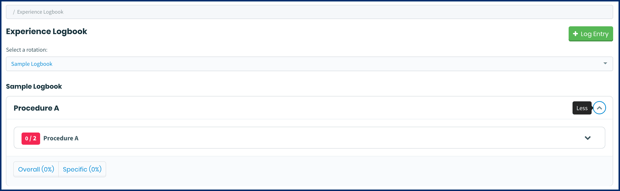
Navigate to your logbook and select a course.
-
You’ll see an overview of the requirements for each loggable objective (e.g. setting names, roles, etc.). Click on a specific label to see your requirements and progress within that category.
-
Click the chevron on the right of the card to expand it and view the overall count of logged entries.
-
Click the down chevron to view a list of all logged entries within that requirement.
-
If a top level card is the title of a hierarchical tag set, you’ll see multiple objectives within that set when you expand the card.
-
Click the down chevron beside an objective to view a list of all logged entries for that objective.

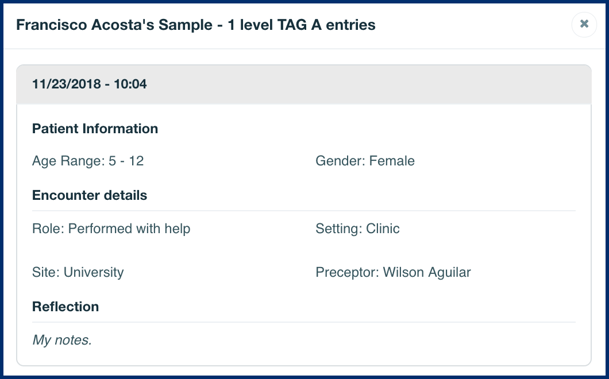
- The time recorded for an encounter can also be shown to learners, as depicted above.
![]()
-
Navigate to Admin> Clinical Experience.
-
To view a logbook for a single learner, search for the learner as necessary and click Logbook on the learner card. You will jump to the Progress Report for that learner.
-
To view logbook reporting for multiple users, click on the Logbook tab below the Clinical Experience header.
-
Set course/cohort and curriculum period filters as needed. Click on a filter to open a dropdown selector. Click on the filter again to close it.
-
Filter by course to view all learners enrolled in a course. Note that you can apply multiple courses so carefully check you’ve included the ones you want. After you select a course, you can set the appropriate curriculum period.
-
Filter by cohort to view all learners in a cohort.
-
To remove a course or cohort from the list, deselect the course/cohort name or click Clear Filters.
-
-
By default the page will filter to Learners who have incomplete logbooks.
-
If your organization uses Clinical Experience > Rotation Schedule and has enabled the logbook to use rotation schedules for reporting:
-
Elentra checks learners’ rotation schedules and sees which rotation the learner is currently scheduled in. If learners are half way through a rotation but have less than 50% of the logging requirements complete, they are deficient. (This threshold can be changed in the database as required by contacting Elentra Support. The database setting is logbook_outstanding_percentage)
-
-
-
-
- If a learner is booked into two slots within the same course, the system will take the dates of the second slot to measure completion.
- Check off the Use this course rotation schedule to generate the logbook report selection to generate a logbook report based on the course rotation schedule.
-

-
If you are not using Clinical Experience > Rotation Schedule, learner deficient status will be based off of curriculum period dates.
-
Note that you can download a CSV from multiple pages; each CSV should reflect the information you were viewing in the user interface. Press the Download CSV button on the page to download the report into a CSV format.
- CSV will include: learner name, learner #, learner email, list of courses and number of pending entries for each course.
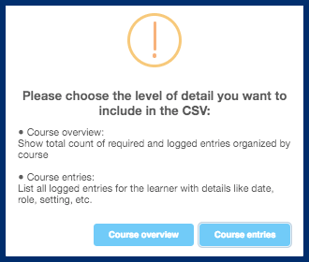
- Some CSV options will offer you two download versions, as depicted in the screenshot below:
- Course overview: Show total count of required and logged entries organized by course.
- This will include learner name, learner #, learner email, course name (called rotation), objective, required, and logged.
- Course entries: List all logged entries for the learner with details like date, role, setting, etc.
- This will include learner name, learner #, learner email, course name (called rotation), objective, required, logged, encounter date, patient age range, patient gender, role, setting, site, preceptor, and notes.
- Course overview: Show total count of required and logged entries organized by course.


-
You'll see a list of learners and their overall logbook completion status (e.g. 3 Outstanding).
-
Click the plus icon to open a view of the learners logbook progress in multiple courses.
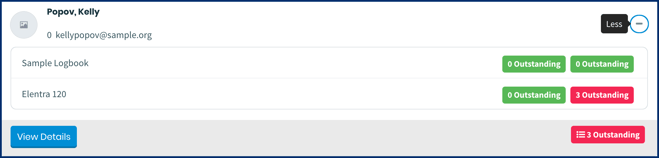
-
Click on View Details to open a Progress Report for a specific learner in a new tab. More information on Individual Progress Reports is in the section below.
-
After clicking on View Details to open a Progress Report for a specific user, you can filter by course and curriculum period.
-
Optionally View Details or Download a CSV.
-
If downloading a CSV, opt for Course Overview or Course Entries.
-
-

-
Click View Details on a course card to see an overview of progress.
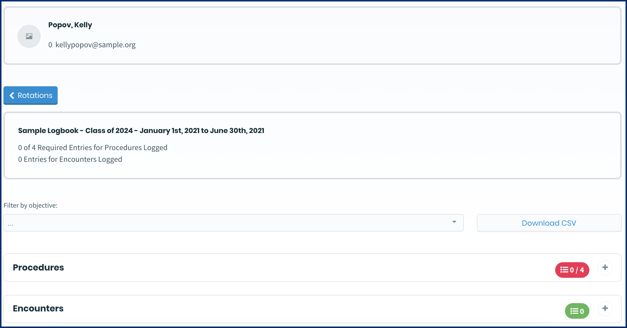
-
From each objective you can click the + icon to see an overview, and then click View entries to see a list of individual logged entries.