Article Content
Course Creation
Reminder: Only users who have Medtech: Admin or Staff: Admin permission levels are able to create courses.
Create a New Course
Step 3: Click Save.
- Curriculum Layout: Defined in Manage Curriculum > Curriculum Layouts. This will give the course access to the curriculum periods in that curriculum layout and will categorize that course under that layout.
- Course Name: The course name will be displayed to users.
- Course Code: A code that you define and will be displayed to users.
All radio button fields on this page have a default value that will be selected. All fields on this page can be changed after the course has been created.
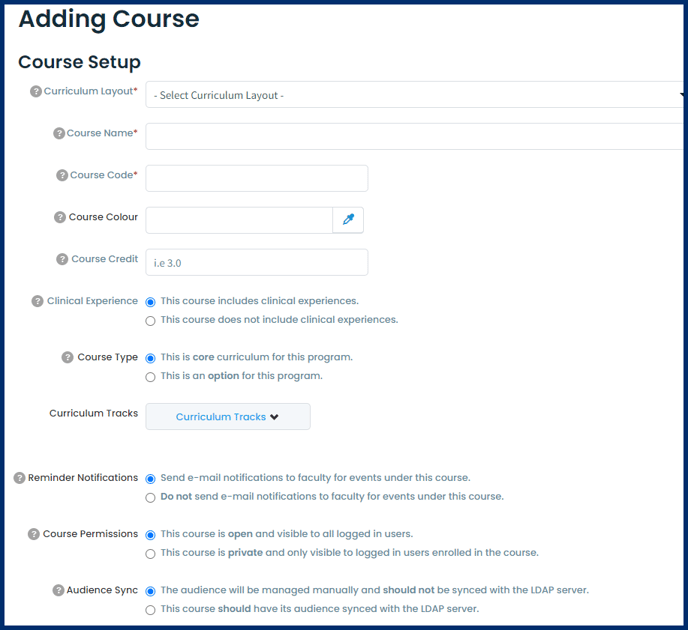
There are four sections on the Adding Course page
Each of these sections is detailed below:1. Course Setup Section
Curriculum Layout: This defines the curriculum layout for this course and will dictate what curriculum periods are available to be used in the enrolment section for the course.
Note: It is NOT recommended to change the curriculum layout of a course after it has been created and used. Doing so will result in problems with the course and event audiences. If an existing course is being moved from one layout to another, you should create a new course in the new layout and deactivate the old course.
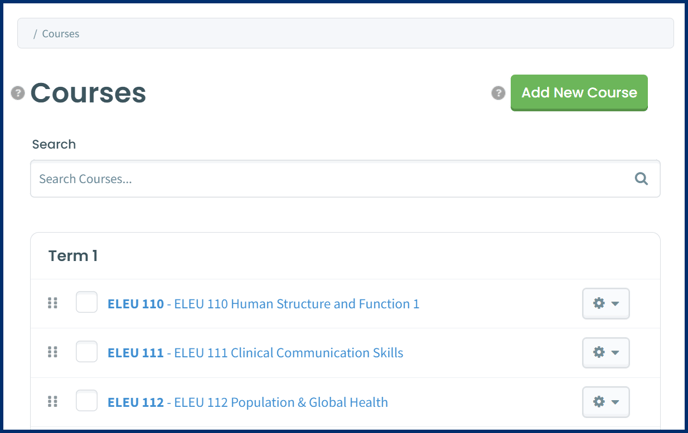
Course Name: This will display to users on the Courses tab and in all associated learning event pages.
Course Code: This will display as part of the course identification visible to users on individual learning event pages and will also be used in the list of events from the Learning Events tab. The course code is also used in the breadcrumbs when you are managing courses and their different pages so codes should be logical.
Course Color: If you select a color, it will be used to color the learning events associated to the course on the Dashboard Calendar and Learning Event Calendar. You can further customize the color of specific events when you create them. The color set on the individual event will take precedence over the color set for all events on the course Setup tab.
Course Credit: If you track credits per course you can enter that information here. This information is displayed on the Student Report Card (one of the System Reports available to administrators).
Note: This option doesn’t impact the course template, however if you plan to use user-initiated, on-demand forms, you should set the course to the core curriculum option. Users will not be able to initiate on-demand forms associated with optional courses.
The email template includes the following text:
| Dear %TO_FIRSTNAME% %TO_LASTNAME%, %CC_FACULTY_TEXT%This is an automated notice to remind you that you are scheduled to teach in the following learning event. Event Title: %EVENT_TITLE% Phase: %EVENT_PHASE% Event Date / Time: %EVENT_DATE% Event Duration: %EVENT_DURATION% Event Location: %EVENT_LOCATION% Associated Faculty: %ASSOCIATED_FACULTY_TEXT% To update your event click this link: %EVENT_LINK% |
- An open course will allow all logged in users (faculty, staff, students) to view it. If you attach the course to a community or course website you'll be able to set permissions for the course website as well.
- A private course will only be accessible to users that are associated with the course in some way (i.e., a student enrolled in the course, faculty and staff listed in the Course Contacts section). If selected, you will have the option to set viewable start and finish dates in the Course Enrolment section that will be applied to all associated events in the Manage Events.
Note: that Medtech: Admin and Staff: Admin users can always access all courses regardless of course permissions.
Note: After a course has initially been created, you'll see a space to optionally add a course image on the Setup tab. Please note that this image does not currently display anywhere in Elentra. If you want to include an image on the course page or website it is recommended to add it via the Course Description (on the Content tab) or on a community page.
2. Event Attendance Section

- Geolocation Attendance Reminders: If enabled, your learners will receive attendance reminder emails if their attendance has not been taken on the event at the specified time before or after learning events associated with this course.
- Enhanced Late Tracking: When enabled, learners will be marked late if their attendance is taken later than a specified number of minutes after the start of an event. You may also alert faculty assigned to this course when learners are late.
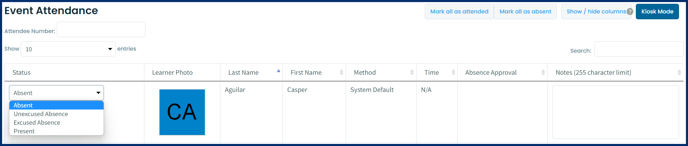
Optionally, enable Send Follow-up notification to notify specified faculty if there are students still marked as Absent after a specified number of days after an associated event. - Enhanced Absence Tracking: If enabled, learners will be marked as Absent if their attendance is taken after a specified number of minutes after the event start time. Select faculty to notify of absences. Having this option turned on will also enable additional options for taking attendance on the Attendance tab of an associated learning event. Instead of just marking whether the student was present or not you will be able to choose one of the following absent, unexcused absence, excused absence, present.
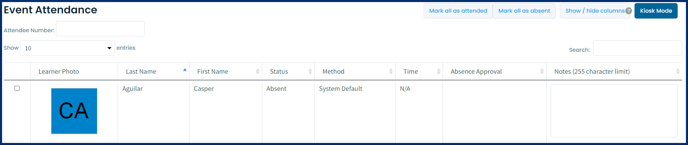
The event Attendance without the Enhanced Attendance enabled:
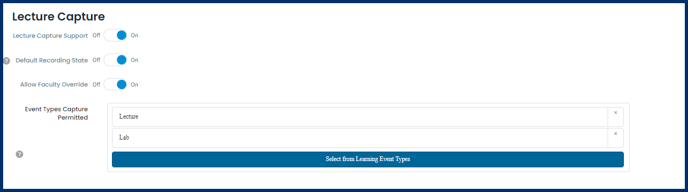
3. Lecture Capture Section
4. Course Enrolment Section
Complete this section when you have the students for the course(s) added in the Manage Users module in your organization and sectioned into cohorts or course lists as appropriate.

-
- Start Time: If applied;
- The audience of the course cannot see the course in their Courses tab until the start date and time
- All events associated with the course are automatically hidden from the audience of the course's view until the start date/time
- End Time: If applied;
- The audience of the course cannot see the course in their Courses tab after the finish date and time.
- All events associated with the course are automatically hidden from the audience of the course after the finish date and time.
- Additional Information:
- If this feature is in use, events from this course will appear as pink in the Admin View list view of events. This is to mimic the behavior of any event that has visibility restrictions set a the event level.
- If an admin sets a viewable start and/or finish date for a course, then adjusts one or both to a new date and time, the system will overwrite the original viewable start and/or finish date on all associated events and warn the user: Adjusting the viewable start and/or finish date will result in the start and/or finish dates being overwritten on all associated learning events.
- Start Time: If applied;
Warning: After the viewable start and finish dates have been set at the course level, the admin can adjust visibility rules on individual events, but if they subsequently change the dates at the course level, their changes at the individual event level will be overwritten by their new overall viewable start and finish dates.
Course Setup Tab
- Course Contacts Section
- Course Reports Section
- Course Syllabus Section
Course Contacts Section
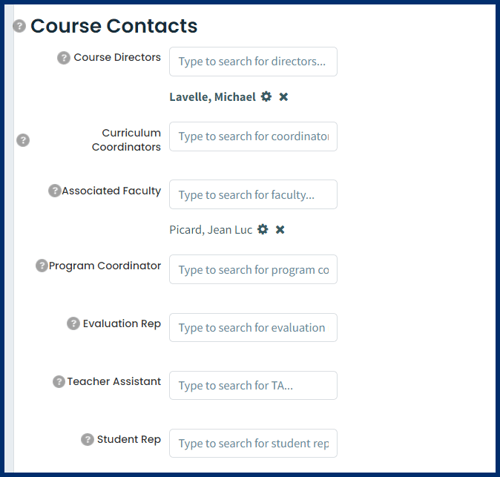
- Edit the course content, view course enrolment, view and edit the course gradebook
- Edit the Content tab of all learning events in the course
- User contact information will be displayed on the course page
Note: Staff: Admin users already have access to all courses, events, etc. so adding someone here is more for the purpose of displaying contact information on the course page.
- Users will be added to a list visible on a course page or course community (course website).
- Users must be added to this list if you want to add them as a grader on a gradebook assessment or exam in the Exam module.
- Users added here will be easily accessible in the Assessment and Evaluation module so you can quickly include them in a distribution.
- Add, edit, and delete learning events for that course
- View and edit the course gradebook (and other course tabs)
- Access and edit information for this course in the Clinical Experience module (e.g., rotations, logbook reporting, leaves of absence, etc.)
- Access a list of My Learners in the Assessment and Evaluation and the Clinical Experience module
- View the admin view of the Assessment and Evaluation content for this course (e.g. items, forms, distributions, prompted responses.
- View the CBME program dashboard (if CBME enabled)
- Program Coordinator information can optionally display on a course page or the course website's Background page. This is controlled through a database setting (community_course_outline_hide_pcoordinators). Please submit a support ticket if you would like this changed.
Note: Students only need to be assigned the Teaching Assistant role in one course in order to be granted access to their assigned grading tasks across all courses. The student will see all grading tasks assigned to them, even if they have not been explicitly assigned as a Teaching Assistant in the associated course.
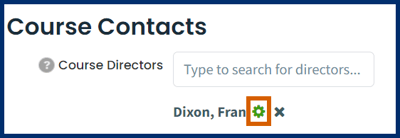
Custom Course Roles
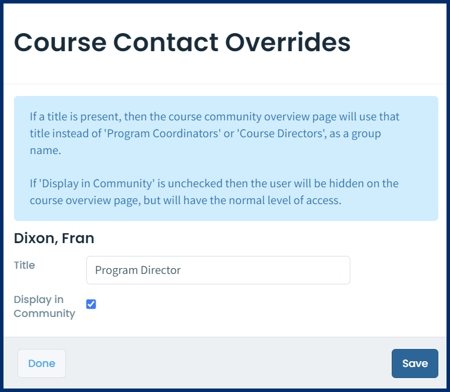

Without a Custom Course Role enabled the course website shows the name as Director:

Note: The Custom Course Roles feature only applies to course websites in the Communities module and not to the default course page on the Content tab of the course.
Course Reports Section
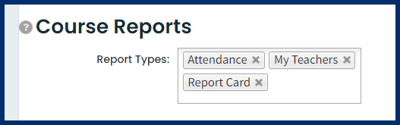
Warning: Report Card does not fully function right now, but it is intended to allow users to select a learner, and view a table showing curriculum tags as rows, and learning events, simulations, and logbook across the top. In each grid matrix you see a completion rate (e.g. 1/3, 2/5) in terms of attendance and completion. For the learning events the denominator is the number of events where attendance was required and that curriculum tag was applied. The numerator is how many times the learner was present at those events (this tool assumes you are using attendance tracking in Elentra).
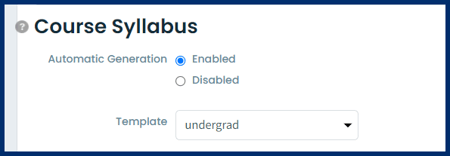
Course Syllabus Section
Deleting a Course
Warning: Once a course is deleted there is not a way to recover it from the user interface. It is a soft delete, so the course data does still exist in the database. If a course has been deleted in error please contact Elentra Support to ask about recovery.
![]()