Article Content
This article covers the following topics. Click on the topic to go to that section of the article.
Permission Levels in Elentra
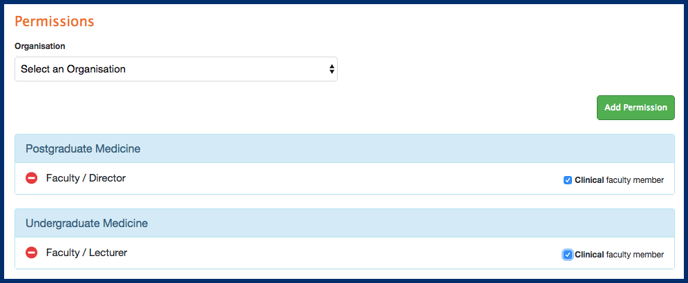
One group and one role is chosen for a permission level. A user can hold multiple group permissions but can only have one role assigned within each group. For example, a user can have the permission level Staff:PCoordinator and the permission level Faculty:Director at the same time in the same organization. On the other hand, a user cannot have a permission level of Faculty:Director and Faculty:Faculty because they can only be assigned one role within the same group at one time in the same organization.
Below are group and role settings and their general system permissions.
|
Group
|
Role
|
System Permissions
|
|---|---|---|
|
Medtech
|
Admin
|
Medtech:Admin user is the super user permission in the system.
|
|
Medtech
|
Staff
|
The Medtech:Staff user has basic read-only access, so cannot make changes in the system and does not have access to Admin menu items.
|
|
Staff
|
Admin
|
The Staff:Admin permission allows a user to access almost all content within an organization.
|
|
Staff
|
Pcoordinator
|
The Staff:Pcoordinator permission (as in Program Coordinator) can
|
|
Staff
|
Staff
|
The Staff:Staff have basic read-only access so cannot make changes in the system and does not have access to Admin menu items.
|
|
Staff
|
Translator
|
The Staff:Translator permission allows users to access Curriculum Tags for the purposes of providing translations.
|
|
Faculty
|
Admin
|
Faculty:Admin can pretty much do anything in the system within their designated organisation. They will be able to access all courses including gradebooks and events. Use this permission sparingly.
|
|
Faculty
|
Director
|
The Faculty:Director can be assigned as a Course Director on a course. They will be able to edit the content of any course pages/websites, learning events, or gradebooks in their assigned courses. They will not be able to view or edit non-assigned courses.
|
|
Faculty
|
Lecturer
|
This is the most common permission for faculty to have. Faculty:Lecturer users can
|
|
Faculty
|
Faculty
|
The Faculty:Faculty permission gives users basic read-only access. They can be set as graders in a course or assessors in the Assessment & Evaluation Module.
|
|
Resident
|
Lecturer
|
This can be used in UG installations where residents act as lecturers.
|
|
Resident
|
Resident
|
This can be used in UG installations where residents play some role. Do not use this group and role for PG installations of Elentra using CBME; in that case the residents should be student:student.
|
|
Student
|
Student
|
|
|
Alumni
|
Year of Graduation
|
Have basic read-only access.
|

Masquerading as Other Users
- Medtech: Admins: Can masquerade as any user group and role, including as other Medtech:Admins.
Caution: When masquerading, be aware that you can act in all ways as the user you are impersonating. Exercise caution when masquerading as other users. There is no way to differentiate between actions taken by the user, and actions taken by a masquerading user.
To masquerade as another user:
Step 1: Navigate to Admin> Manage Users.
Step 2: Utilize the search or browse tools to find the user's profile who you want to masquerade as.
Step 3: Click on "Login As" on the user's profile to masquerade as that user (if eligible, given your own permission group & role). You will be directed to that user's dashboard, and access is limited to whatever that user has access to.

Step 4: To log out as the user, click on their person icon > Logout. You will be redirected to the Manage Users page logged in as yourself.
Admin Assistant Permission Masks
This tool allows an administrative assistant to act in Elentra under the identity of another user. While there is a back-end record of what actions were taken while an admin. assistant is in the masked identity, through the user interface all actions the admin. assistant takes will appear as if taken by the faculty member so this tool should be used with caution.
This tool is available for the following permission levels in Elentra:
- Medtech:Admin
- Staff:Admin
- Staff:PCoordinator
- Faculty:Director
- Faculty:Lecturer
Setting up an administrative assistant
Step 1: Click on the user name in the top right corner of the page.
Step 2: Click My Admin Assistants.

Step 3: Type in the name of another user, and click on it. Set access start and finish dates and times to limit when the admin. assistant will be able to be masked as the faculty member. By default it will set access to for one week.

Step 4: Click Add Assistant.
Removing an Assistant
To remove an admin. assistant navigate to click the checkbox beside their name and click the Remove Assistant button.
Administrative Assistant Perspective
If a user links their account with admin. assistants', the admin. assistants will see a Permission Masks card on their sidebar and can select to use another id at any time during the active permission mask period.

