![elentra_logo_Blue-and-Black-3.png]](https://help.elentra.com/hs-fs/hubfs/elentra_logo_Blue-and-Black-3.png?height=40&name=elentra_logo_Blue-and-Black-3.png)
Article Content
This article covers the following topics. Click on the topic to go to that section of the article.
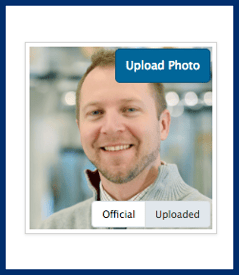
Introduction to Profile Photos
- an official photo
- a user uploaded photo



Adding Profile Photos
Prepare your photos before you begin the import:
- Format: JPEG photos only, packaged in a single .zip file.
- File naming: Name each photo using the person’s username or student/staff number (for example, jsmith2024.jpg or 1004567.jpg). Elentra matches photos to user accounts by file name, so accurate naming is essential.
- Photo size: Maximum 10MB per photo.
- Zip file size: Maximum 80MB total. If you’re importing a large cohort, split your photos across multiple zip files and import them one at a time.
- Final image size: Elentra automatically saves each photo as a 250×250px official photo, with a 98×98px thumbnail generated for use throughout the platform.
Step 1: Navigate to Admin > Manage Users.
Step 2: Click Import Photos, next to Import From CSV and Add New User.
Step 3: In the Import Photos pop-up, review the Important Notes, then click Choose File and select your prepared .zip file.
Step 4: Click Import Photos to start the upload.
Step 5: Wait while Elentra processes your file. You’ll see an Importing… indicator while the matching and upload process runs.
Step 6: When processing finishes, you’ll be taken to the Import Photos Results page, which summarizes what happened to every photo in your file. This page is only available after your import so be sure not to navigate away from it until you have read all of the information.
Understanding the Import Results
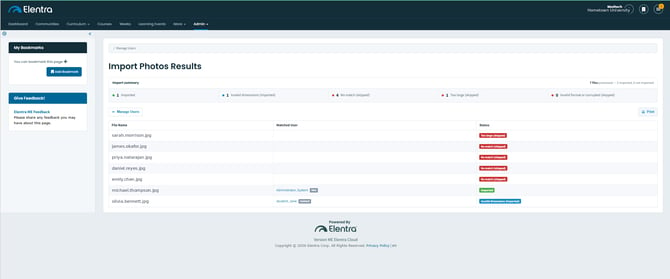
The Import Photos Results page
At the top of the page, five summary counts show you the outcome of your import at a glance:
- Imported – Photos successfully matched to a user account and saved as that user’s official photo.
- Invalid Dimensions – Photos that were imported but didn’t match Elentra’s recommended photo dimensions.
- No Match – Photos whose file name didn’t match any existing username or student/staff number.
- Too Large / Skipped – Photos that exceeded the 1MB per-photo limit and were not imported.
- Failed – Photos that could not be processed, for example a corrupted or unreadable file.
- File Name – The name of the photo file as it appeared in your zip file.
- Matched User – The user account Elentra matched the photo to, if any. Click the name to view that user’s profile.
- Status – One of the outcomes described below.
Below the summary, a table lists the outcome for every file in your zip, with three columns:
- File Name – The name of the photo file as it appeared in your zip file.
- Matched User – The user account Elentra matched the photo to, if any. Click the name to view that user’s profile.
- Status – One of the outcomes described below.
Note: Square images work best in Elentra. If portrait-style photos are provided, the import process will take the center of the image and crop out the top and bottom to create a square. This may lead to some user photos not displaying properly. If your institution cannot provide square images, we can either proceed with the automated cropping; or alternatively, add white bars to either side of the user photo to make the image square.