Faculty & Students can log meetings & related documents within Elentra
Article Content
This article covers the following topics. Click on the topic to go to that section of the article.
Meeting Logs Overview
Learners, faculty and program administrators can log meetings to maintain a record of conversations about learner progress. In addition to creating a meeting entry, users can also upload supporting files per meeting.
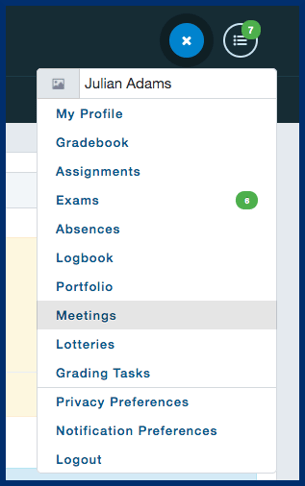
Learners can access Meetings from the user icon in the top right; and Faculty can access their learners' meetings from the user icon and My Learners (which will take them to the Assessment and Evaluation My Learners view). In CBME enabled organizations, users can also access the Log Meeting button from the learner's individual dashboard.
Faculty / Staff View
- Click on your User icon, then My Learners, OR
- Click on your Assessment & Evaluation badge, then click on the My Learners tab.
Step 2: Navigate to the student with whom you met, and click on the 3 dots on their user card. Click on "Meetings".
You will be directed to a Meetings dashboard, where you will see any previous meetings that have been logged with this student (regardless of author). 
Step 3: Click on "Log a Meeting"
Step 4: Enter in your meeting date, and comments. Click "Create Meeting" once complete.

You will be redirected to the Meetings dashboard for that student.
Logged meetings can have files uploaded to them, be edited or be deleted using the tools in the Actions column. Staff: Admins; Faculty: Directors, and Faculty assigned as course group tutors can create or add to any entry they have made (but not those made by other users).
Note: Meeting logs created by faculty and staff are visible to the learner.
Learner View
Learners have quick access to view their own meeting logs from the CBME dashboard My Meetings button. 
In a non-CBME enabled organization, learners can access Meetings from the user icon in the top right.

Step 1: From the user icon or CBME dashboard, click Meetings. 
Step 2: Click Log New Meeting.
Step 3: Learners will be prompted to identify an advisor they met with. Click Browse Advisors, select a Curriculum Period (e.g. Sept. 1, 2020 - July 15, 2021) and then search for or select an advisor.
Note: The list of advisors available to a learner is based on the course group tutors assigned to them.
Step 4: Enter the date of the meeting. Optionally, add any comments from the meeting.
Step 5: Click Create Meeting.
After the meeting is created, learners can optionally upload supporting files by clicking the upload icon in the Actions column.
