Create, manage, and dismiss notices in Elentra
Article Content
This article covers the following topics. Click on the topic to go to that section of the article.
Create a Notice
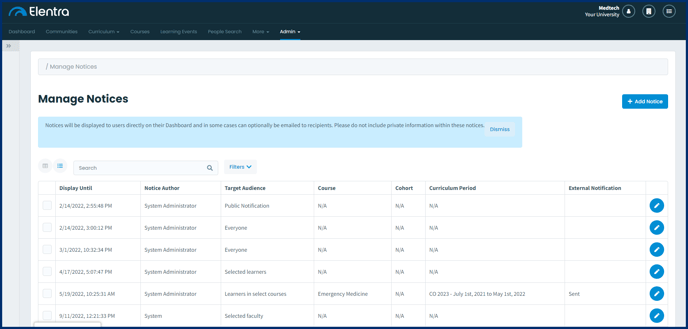
To begin, click on Admin> Manage Notices. This is the Notices Dashboard.

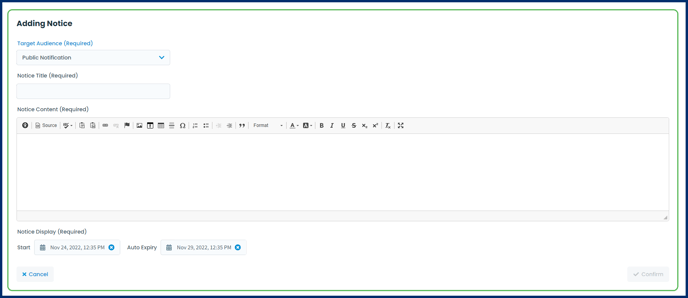
From the Notices dashboard, you can create, edit, and delete notices. Click on Add Notice.

Target Audience: Depending on your selected audience, additional selectors will appear.
Notice Title: This will display as the email subject line if you opt to send the notice as an email.
Notice Content: Rich text editor capabilities.
- Notice recipients will be bcc'ed on the message, and notices will be sent to the primary email on file for each included user.
- The "from" email for the message will be the primary email for the user creating the notice (notice author).
- Note that you will not see the option to send email notices for all audience types to prevent users from inadvertently emailing hundreds of users.
Notice Display: Set the duration of visibility for your notice. The name of the notice author will display to users when they view the notice.
Click Confirm to save and issue the notice.
Manage Notices
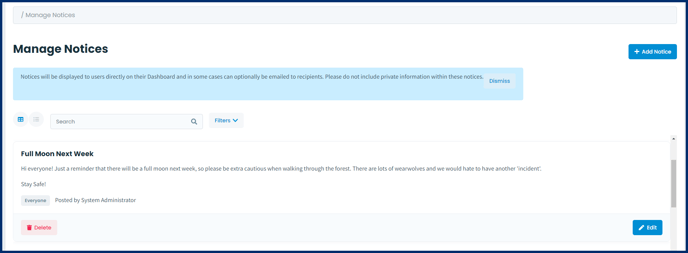
The Notices Dashboard can display in a grid view (shown above) or in the card view. Within the grid view, you can see the display period, author, and target audience details. To access the card view, click on the list button toggle, to the right of the search bar.

Additionally, to the right of the search bar, you can filter your list of notices by target audience, course, cohorts, and more.
From both views, you can edit or delete notices using the buttons as shown above. To see how many users have viewed the notice, click on the Edit button. Within the edit screen, you will see an eye icon with a number at the top right.

