Your school may have enabled the ability for learners to submit absence requests, for managing attendance on learning events. To navigate to your absence dashboard, click on your person icon > Absences. Depending on how your school has configured their settings, you will either track absences by day, or by learning event.
Dashboard Overview
A list of the requests the have made will be on this page. Icons will indicate whether or not requests are approved. Each request can be expanded (+sign icon) to allow learners to see more details about the request.
Clicking on the Absence Dashboard table will show the student which learning events they were marked absent from. They can expand each event to get more details.
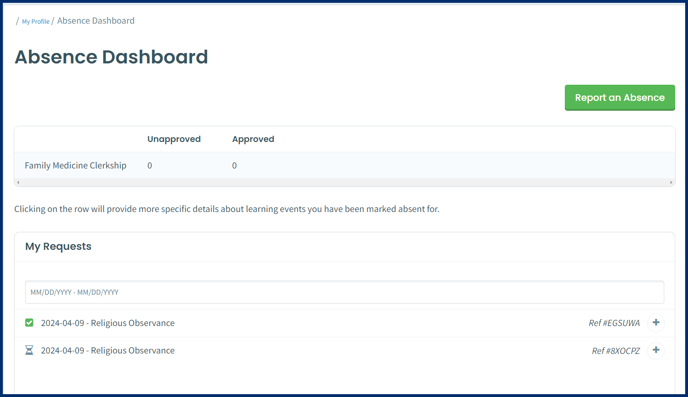
Note that the numbers in the table will only appear once attendance is tracked for a learning event IF the staff/admin selected “Track by sessions”. If they select “track by days”, the numbers in this table will reflect approved vs. rejected requests.
Log an Absence Request
Step 1: From the user icon in the top right, click Absences.
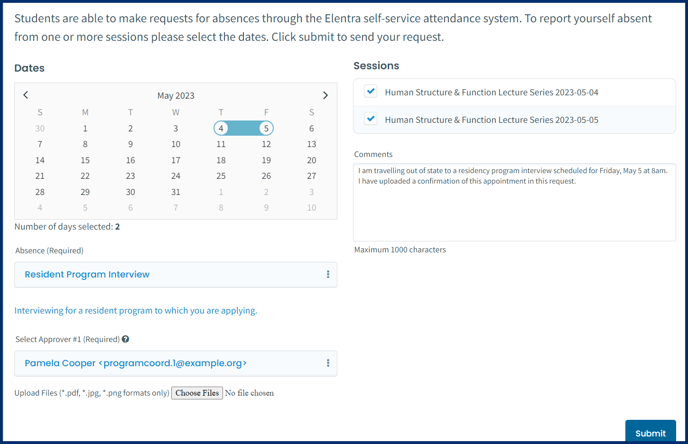
Step 4: Select the reason for absence (the reason description will display), add any comments, and upload any associated documentation.
Note: You may need to select the approver to send the request to; depending on how your school configured their settings.
Manage My Absence Requests
- Absence Requests will display in a table in your Absence Dashboard.
- Pending requests will display an hourglass icon. An approved request will have a green check mark icon beside it. A rejected reuest will have a red X icon beside it.
- If an edit is required (adding of documents, more explanation, etc.), you may add this information to any pending request. Once a request is approved or rejected, you will not be able to edit it.
- If any additional information is required regarding the request, you may receive a notification on your Elentra ME Message Center (on the main dashboard). Each request will have an associated reference number which will allow for easy tracking and communication.
Note: The numbers in the overview table will not change until the events associated with the request have occurred and attendance has been tracked.