Submit and manage absences as a learner
Article Content
This article covers the following topics. Click on the topic to go to that section of the article.
-
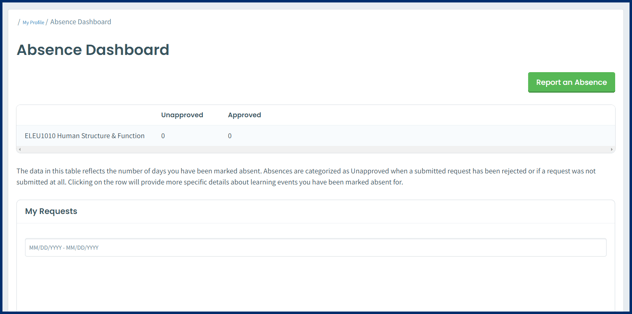
A list of the requests the have made will be on this page. Icons will indicate whether or not requests are approved. Each request can be expanded (+sign icon) to allow learners to see more details about the request.
-
Clicking on the Absence Dashboard table will show the student which learning events they were marked absent from. They can expand each event to get more details.
- Be aware that the numbers in the Approved/Unapproved table will only appear once attendance is tracked for a learning event IF the staff/admin selected Track by sessions. If they select track by days, the numbers in this table will reflect approved vs. rejected requests. (This design is to satisfy the different attendance tracking requirements of different programs.)
Logging an Absence
To begin, navigate to your Absence Dashboard by clicking on your profile icon> Absences.
 A list of absence pools you are a member of will display in a table, along with summary totals of your unapproved and approved absences. Your requests will be in a table below. Click on Report an Absence to log a new absence.
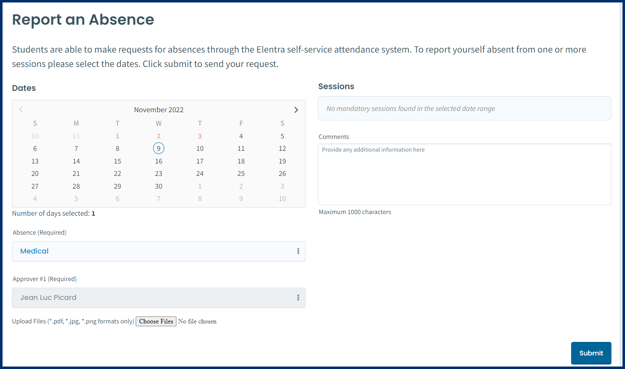
 Complete the date(s), reason for absence (the reason description will display), any comments, and any associated documentation.
Note: Approvers may have been defined for the reason selected or you may be prompted to select an approver if needed.
- An icon indicates whether the request is pending, approved, or rejected.
- An approved request will have a green check mark icon beside it. Be aware that the numbers in the overview table will not change until the events associated with the request have occurred and attendance has been tracked.
Note: The numbers in the table will only appear once attendance is tracked for a learning event IF the staff/admin selected Track by sessions. If they select track by days, the numbers in this table will reflect approved vs. rejected requests.
