Entering & Adjusting Grades

There are several ways to enter grades into the gradebook including importing grades with a CSV, manually entering grades, linking an assessment to exams, and using an assessment form which automatically populates the grade when completed


Article Content

This article covers the following topics.  Click on the topic to go to that section of the article.

This page describes the grading actions available in a course gradebook. Staff: admin, staff: pcoordinator, and faculty: director users assigned to a course can access a course gradebook and enter grades from Admin > Manage Courses > Course > Gradebook. There are several ways to enter grades into the gradebook including importing grades with a CSV, manually entering grades, linking an assessment to exams, and using an assessment form which automatically populates the grade when completed

Note: If an organization wishes to permit bonus grades for individual assessments, an optional database setting can be enabled to allow gradebook assessments to be scored over 100% (gradebook_assessment_bonus_marks).


How to Manually Enter Grades

  • Navigate to Admin > Manage Courses. Search for a course as needed.
  • Click the cog icon to the right of the course name and select Gradebook.
  • Ensure you are in the correct curriculum period and adjust using the period selector in the top right if needed. (The current curriculum period will display by default.)
  • Search for and click on the title of the assessment you would like to grade. This will take you to the assessment page.
  • Click in the grade column beside a learner name/number. Enter the appropriate grade.
  • Your work saves automatically.
Another option is to open the grade spreadsheet for a course and input grades directly in the spreadsheet. See the grade spreadsheet section for more information on how to use it. 
Custom Grades
In the course gradebook, when grading an assessment with an attached Assessment and Evaluation form, admin users and course directors can optionally check the Custom Grade box and enter a value. This allows you to override the automatically calculated grade based on the students answers while completing the form.

Note: Custom grades and adjusting point values per form, per learner are not currently available to graders assigned to a specific assessment and/or learners. The feature only works when you are entering grades as a course administrator (i.e., Curriculum Coordinator or Course Director).

To add a custom grade, follow the below steps:
  • Navigate to your program's gradebook by Admin> Manage Programs> Select a Program> Gradebook tab.
  • Ensure the curriculum period is selected with the gradebook assessment that you're looking for  
  • Click on the assessment with an attached Assessment and Evaluation form.
  • Within the assessment page, find the student you'd like to add a custom grade for and click on the cell of their Grade column. This will open the page with their form answers
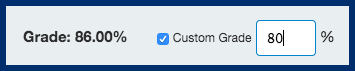
  • At the bottom left corner of the page, you will see their automatically calculated grade, and the Custom Grade checkbox beside it
  • Click the Custom Grade checkbox and enter the custom grade you'd like to override it with
  • Press the Save and Close button in the bottom right corner 
kb55
Adjusting Point Values Per Form Question
In the course gradebook, when grading an assessment with an attached Assessment and Evaluation form, admin users and course directors can optionally adjust the point awarded to a learner's response to an individual form question. This allows for a more specific grade calculation down to the level of the question response for an attached Assessment and Evaluation form.
To adjust the point values of a form question for a student, follow the below steps:
  • Navigate to your program's gradebook by Admin> Manage Programs> Select a Program> Gradebook tab.
  • Ensure the curriculum period is selected with the gradebook assessment that you're looking for.  
  • Click on the assessment with an attached Assessment and Evaluation form.
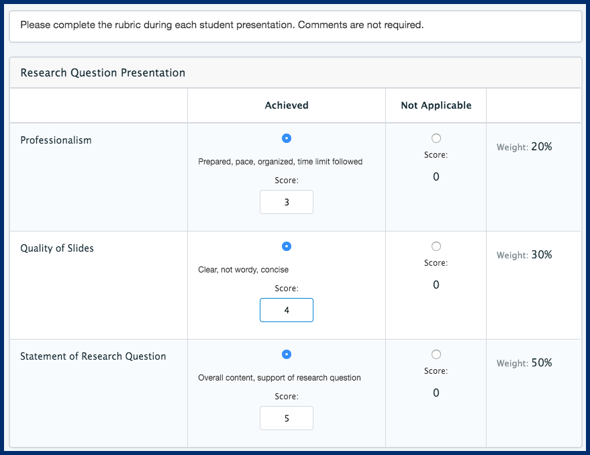
  • Within the assessment page, find the student you'd like to adjust point values for. This will open the page with their form answers.
  • Underneath the questions, you will see the Score: box. Enter the adjusted score for the student's question here as needed.
  • Press the Save and Close button in the bottom right corner 
In the example below, each 'Achieved' score was set to 5 by default. Professionalism and Quality of Slides have been updated to 3 and 4 respectively. The adjusted point total will be taken into account to calculate the learner's grade.
kb56
 Return to Article Content Section Image Beveled v1

How to Import Grades Using a CSV

Grades can be imported by using a CSV file and is available to users that have access to a course gradebook like staff: admin, program coordinators and faculty directors associated with the course. Faculty assigned to grade assessments for specific learners should enter grades via My Grading Tasks. 
  • Navigate to Admin > Manage Courses.
  • Search for a course as needed.
  • Click the cog icon to the right of the course name and select Gradebook.
  • Ensure you are in the correct curriculum period and adjust using the period selector in the top right if needed. (The current curriculum period will display by default.)
  • Search for and click on the title of the assessment you would like to grade. This will take you to the assessment page.
  • Click the Import/Export button on the right and select Import grades from the dropdown menu.
  • The data needs to be in CSV format to be uploaded. If you use Excel or Numbers use Save As to create a version of your file as a .csv.
  • The marking scheme dictates what information and formatting should be included in your .csv file to upload. For all imports, include the learner id number or email address to link grades to the appropriate users.
  • For numeric marking schemes include the numerator of the grade
  • For percentage marking schemes include the percentage
  • For pass/fail marking schemes format your CSV so that a pass is 100 and a fail is 0
  • For complete/incomplete marking scheme change the assessment marking scheme to pass/fail, import the marks as listed above, then revisit the Edit Assessment page and change the assessment marking scheme back to complete/incomplete. The marks should update to C’s and I’s as required.
  • Drag and drop or browse you computer to find the file you need to upload. Click Import CSV.
Return to Article Content Section Image Beveled v1

Pass/Fail and Complete/Incomplete Marking Schemes

If you use the pass/fail or complete/incomplete marking schemes, the information stored in the Elentra database about a learner’s grade will be 100 or 0, regardless of what you enter to record the grades. For instance, if you enter that Student A got a 65% and that registers as a P, the database will store a grade of 100 for them.
You can control the threshold of what percentage score counts to register as a pass or complete with the database setting gradebook_passing_grade. (So for example you can make it so that a 50 registers as a P or that a 60 registers as a P. Either way what the database actually stores for a P is a 100.) Contact Elentra Support to adjust this threshold.
To record specific learner percentage grades in the database but represent them as a P or F to learners, you should build a grading scale that can be applied to an assessment for the purposes of displaying grades. That will allow you to record a 65 for a learner, store the 65 in the database and include the 65 in the student’s final grade calculation, but display a P to them in the gradebook.
 Return to Article Content Section Image Beveled v1

Empty Grades

If no grade is entered for an assessment, a dash will display in the grade column and on the grade spreadsheet.
A database setting (gradebook_include_ungraded_assessments) controls whether unentered grades are ignored by Elentra or count as zeros in the administrative view of a gradebook. Contact Elentra Support to adjust this setting.
If you export the grades there will be a blank cell in the spreadsheet where the missing grade is and depending on the setting option used, all missing grades will either be ignored or count as zeroes in the learner's final grade calculation.
Regardless of the setting option you use, learners' views of their gradebooks will always ignore unentered grades so that administrative staff can create all assessments in a gradebook at the beginning of a course and fill in grades over time without learners thinking they have multiple zeroes.
 Return to Article Content Section Image Beveled v1

How to Allow Grade Calculation Exceptions

This feature allows you to modify the weight of an assessment for an individual student.
  • Navigate to Admin > Manage Courses.
  • Search for a course as needed.
  • Click the cog icon to the right of the course name and select Gradebook.
  • Ensure you are in the correct curriculum period and adjust using the period selector in the top right if needed. (The current curriculum period will display by default.)
  • Search for and click on the title of the assessment you would like to grade. This will take you to the assessment page.
  • Scroll down to Grade Calculation Exceptions.
  • Click on Select a Student and select the required learner from the dropdown menu.
  • When the learner name appears below adjust the weighting by typing in the new assessment weight.
  • Remove individual grade calculation exceptions by clicking the red minus button beside a learner name.
If you use this feature you do need to ensure that you rebalance the gradebook weighting of other assessments for the learner. For example, if you reduce a midterm from 10% to 0% because of an excused absence, you will need to manually increase the weight(s) of the same student's other assessments so that the total weight is still 100%.
 Return to Article Content Section Image Beveled v1

Releasing Grades to Learners

When you add an assessment to the gradebook you can specify whether or not to show the assessment in the learner gradebook and you can set start and end date and time to control the visibility of the grade. Grades are released to all members of the course enrolment at the same time. You can’t currently release grades to only selected learners through gradebook.
 Return to Article Content Section Image Beveled v1

Grade Spreadsheet

The grade spreadsheet lists the gradebook assessments of a course's curriculum period, as well as the students linked to these assessments so that all this data is compiled into one place for quick access, input, and exporting. A grade spreadsheet can be accessed from the bottom right corner of a Gradebook Assessments page. By clicking on the Grade Spreadsheet button, students grades can be viewed and inputted directly on the page that loads. The columns of the spreadsheet include all the student's assessments, as well as the weighted totals, cumulative weighted totals, and the opportunity for comments to be added. 
Staff and faculty with access can quickly enter grades into the grade spreadsheet instead of entering grades for one assessment at a time. The grade spreadsheet also indicates if there has been an adjusted grade, or modified weighting for a grade by displaying a red exclamation mark in the cell. Narrative comments about a learner can also be added in the Comments column.
The grade spreadsheet can be exported as a CSV file by clicking the "Export Grades as CSV" button in the top right corner of the page.
Adjusted Grades

Note: The ability to enter adjusted grades on a gradebook spreadsheet is controlled by a database setting (gradebook_adjusted_grades_enabled). To enable the setting, please contact Elentra Support.

 The Adjusted Total Grade feature will allow course administrators to enter an Adjusted Total Grade to the Grading Spreadsheet for a Course Gradebook.
This will allow you to reflect a grade other than that calculated in the Weighted Total column of the Gradebook. An example use case could be: A learner has a weighted total of 75%/Pass (P) in the course, but, because they failed the NBME, their adjusted total should reflect a grade of Incomplete (INC) standing. An administrator or the Course Director can now reflect that adjusted overall grade of INC due to the NBME failure.
  • With the gradebook_adjusted_grades_enabled setting enabled, navigate to a Course Gradebook and open the Grade Spreadsheet.
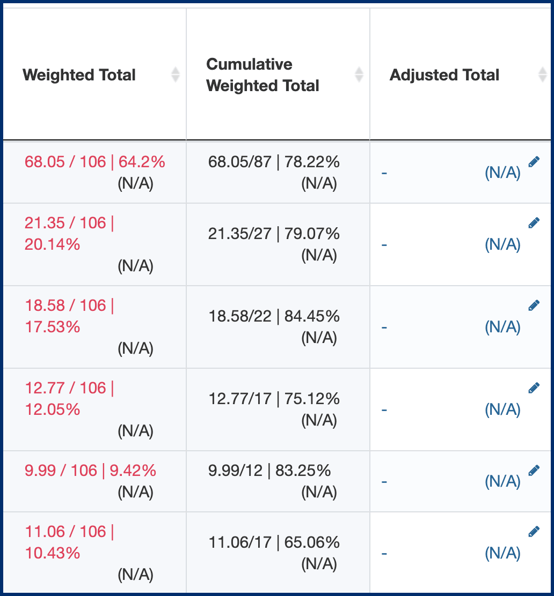
  • On the far left of the spreadsheet, you'll see a column for Adjusted Total.
  • Click on a cell to enter an adjusted total percentage.
kb57
  • Currently the adjusted total will display to learners in their My Gradebooks view.
  • Adjusted Totals will not display in the System Report Learner Report Card.
  • The Adjusted Total is included in the gradebook export and in the Learner Explorer view.
The Comments column in a grade spreadsheet gives course administrators a space to add comments for each learner as needed (e.g., the rationale for a change in weighting to one or more assessments, the rationale behind the application of an Adjusted Total Grade). These comments are not visible to learners.
If a comment has been entered, a filled-in speech bubble will display in the Comments column. 
kb58
When comments are entered, Elentra will display the author's name and a date and time stamp.
kb59
Users may edit or delete their own comments.
Comments are included in an export of the grade spreadsheet. Multiple comments on one learner will be separated by a semi-colon.
 Return to Article Content Section Image Beveled v1

Faculty and TAs Entering Grades

When faculty or learners assigned as TAs are set as graders on an assessment, they will have access to the assessment from My Grading Tasks. From there they can view assessments, complete any attached forms, and enter grades.
 
Accessing Grading Tasks
kb60
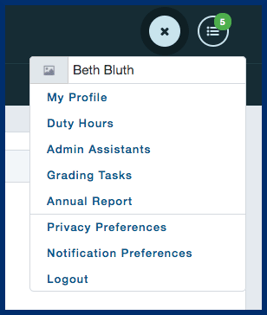
  • As an assigned grader, click on the user name in the top right corner to open the personal menu options.
  • Click Grading Tasks.
  • The Grading Tasks page shows any courses in which a user has a grading task.

kb61

  • Click on the appropriate course and to see assessments with grading tasks.
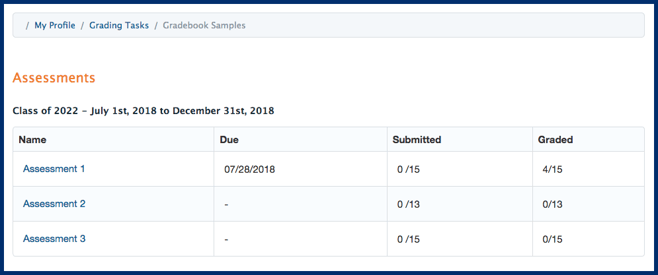
  • In the Submitted column graders can see how many assignments have been submitted (if the assessment includes a drop box). In the Graded column graders can see their own progress towards completion
    kb62
  • Click on an assessment to see a list of learners and to enter grades.
  • Click on a cell in the Grade column and enter a grade.
    • If a form has been attached to an assessment it will open for the grader to view.
    • If a drop box assignment was included, graders will also be able to view and access it.

kb63

Grading via an Attached Assessment and Evaluation Form
If a form created in the Assessment and Evaluation has been attached to a gradebook assessment, graders will see that form when they click on the grade cell for a learner. Graders can complete the form, provide comments as required, and the learner grade will be automatically calculated (form items are weighted and given point totals when they are added to the gradebook).
kb64
 
Note: Custom grades and adjusting point values per form, per learner are not currently supported for users grading outside a course gradebook. Although users will see these options in the user interface, they cannot save a grade if they have customized it.
Additionally, if a custom grade has already been entered via a course gradebook, individual graders will not be able to override that grade.
Additional Public Grading Notes
There is currently no support for assigned graders to view portfolio entries from the public grading page. If a portfolio is attached to a gradebook entries can only be viewed by a staff: admin or course director who has access to the complete course gradebook.
 Return to Article Content Section Image Beveled v1

Grading Discussion Posts

Graders can grade discussion board posts if they've been linked to a gradebook assessment.

To have graders grade a Course Discussion Forum via a Gradebook assessment, you must have the following in place:
1. Your Course Website must be associated with a Curriculum Period.
2. Your Course Website must have a Discussions page type containing at least one Forum.
3. The gradebook assessment must be linked to a discussion forum.
4. You can optionally assign graders (if no graders are assigned to the assessment, only the course director or course staff will be able to enter grades).
 
How Graders Grade Discussion Forum Posts
  • Upon logging in to Elentra, graders can access their Grading Tasks via the profile icon in the upper right-hand corner of the screen.
  • They will be directed to a list of any courses that contain assessments that they have been assigned to grade.
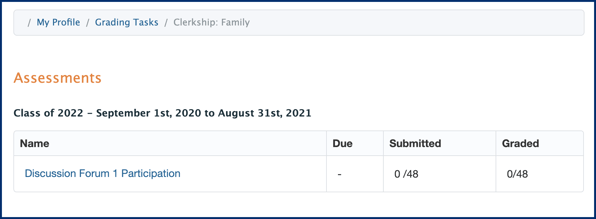
  • Clicking on the title of a course will direct them to the a listing of the assessments associated with that course that they have been assigned to grade
    • If submissions were required, they will see a total number of submitted assessments out the the total number expected.
    • They will see a calculation of the number of assessments they have graded out of the total number expected.
kb65
  • Clicking on the name of an assessment will direct them to the a listing of the learners they have been assigned to grade.
  • To begin grading, click on a cell in the Grade column.
  • The grader can click on the drop down menu in the upper right column to navigate between forums, if more than one is associated with the assessment, and to navigate between a forum(s) and a learner's submitted assignment, if a dropbox has been associated with the assessment.
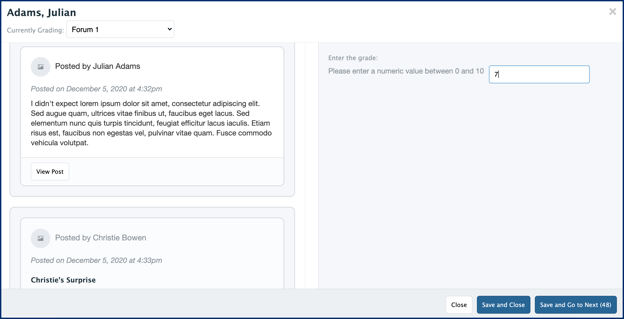
  • When grading a forum, the grader will see the learner's topic post and any replies the learner has made to other learners' topic posts in the selected forum on the left-hand side of their browser.
    • They can use the View Post button to navigate directly to the learner's post in the Discussion Forum. The discussion page will open in a separate tab.
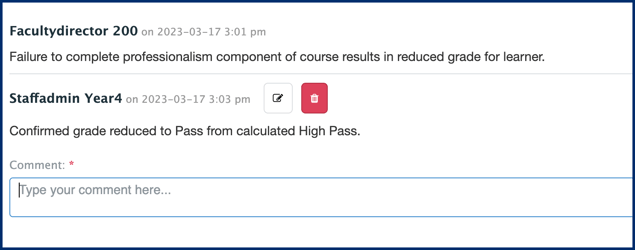
  • On the right-hand side of the browser, the grader will see an area for them to enter a grade or, if an assessment form was attached to the assessment, they will be able to use the assessment form to grade the learner's posts, replies, and dropbox submissions as needed.
    kb66

 Return to Article Content Section Image Beveled v1