Article Content
This article covers the following topics. Click on the topic to go to that section of the article.
Introduction to Creating Exams
In the Exams section of the Exams module you must first create your folder system to organize your exams, then you can create your exams. To create an exam you can either first create questions in the question bank and then gather the questions together onto an exam or you can create the exam and then create the questions on the fly directly from the exam.
The exam can be configured to be scored or not scored, have multiple questions per page, one question per page, or use page breaks, randomize questions, randomize answers, and you can attach PDF resources to be available directly from the exam while taking it.
In Elentra you can deliver an exam multiple times to different sets of audiences and at different times through exam posts and learning events. The exam post has its own set of settings that you can configure differently for each exam post.
Create & Manage Exam Folders
Creating a New Exam Folder
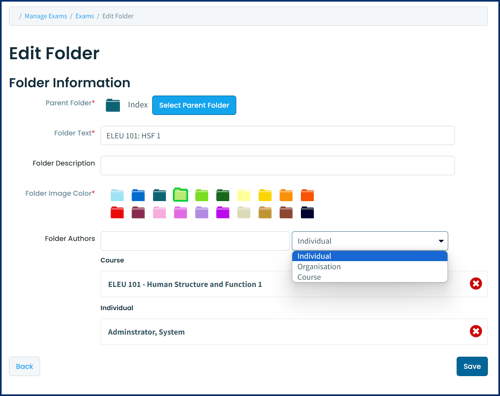
- Click the Select Parent Folder button if you want to create a subfolder within an existing folder otherwise leave it in the index if you want it to be at the top of the folder system. The permission settings of the subfolder will automatically match the permission settings of the parent folder. Click on the desired parent folder and click Move.
- Folder Text: Provide the folder title here. This will display when you click 'Exams' and see a list of folders.
- Folder Description: You will only see this if you open the folder to edit it.
- Folder Color: The system requires you to select a color.

Step 3: Click Save to create the folder.
Copy, Edit, Delete & Manage Folder Authors
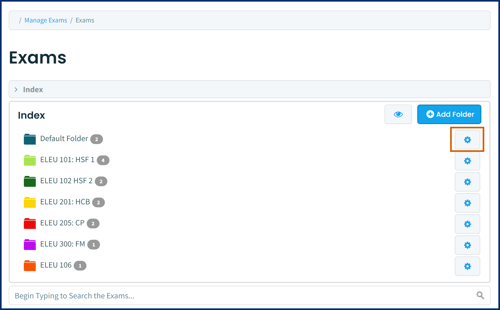
- Admin View: The following image is an example of the Admin view and the gear icon for a folder. Admins will have access to manage all folders in the folder system. They will be able to edit & manage authors, copy, edit, and move the folder.
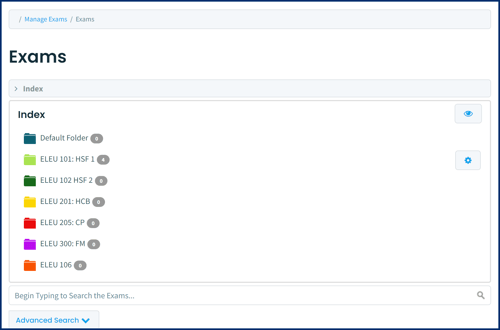
- Faculty:Director & Staff:PCoordinator View: The following image is an example of the Faculty:Director & Staff:PCoordinator view. In this example the user only has access to manage one exam folder in the folder system set up by the Admin user. This permission allows them to manage all exams in the exam folder. They will only have access to manage folders for which they have been given permission to manage by an Admin user. They will be able to see the entire folder system but not necessarily the content in it if they have not been granted permission to it by an Admin user.
Note:
- If you make a folder accessible to an organization, anyone in that organization with access to the Exams module will be able to access the content and manage the folder.
- If you make a folder accessible to a course, any user that has access to the Exams section of the Exams module (Faculty:Director, Staff:Pcoordinator, or Staff:Admin) and listed in the course contacts section of the course setup page will be able to access the content of the folder.
- You can also permission a Faculty:Directors and Staff:PCoordinators to only some of the exams in a folder instead of adding permission to the whole folder. This will make it so that person cannot see every exam in the folder and they will not be able to manage the folder.
- To remove a permission from the exam folder, click the red x beside a name in the list below the search box.
Step 3: Click Save.
Copy & Delete a Folder
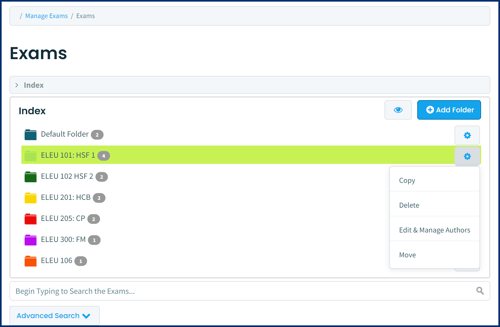
Step 1: To copy or delete a folder click on the gear icon next the folder name.
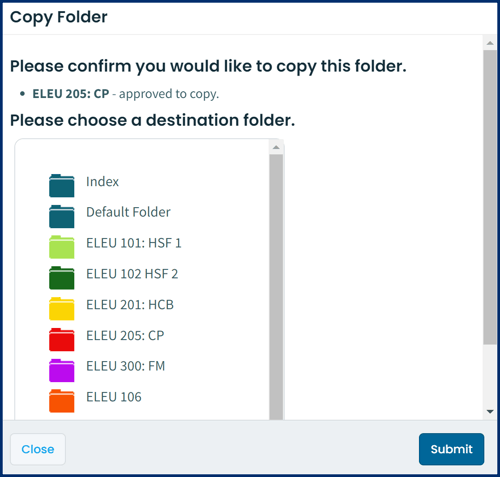
- Click on Copy to make a copy of the folder. A popup will appear asking to confirm the copy and to choose a destination folder. Click submit after choosing a destination folder to confirm the copy. When you copy a folder you are copying the folder and everything inside of it. Your new copy along with everything inside of it will have the prefix "Copy of" affixed to the title.
- Click on Delete to delete a folder. A popup will appear asking you to confirm the deletion of the folder. Click the Delete button to delete the folder.

Warning: You can only delete an empty folder. If your exam folder contains any exams then you must delete the exams first before you can delete the folder.
Create & Manage Exams
Create Exams
When you create an exam you first create an empty exam and then need to add questions to it. You can add existing questions from the question bank or create new questions and add then all in one go. The new questions you create directly on the exam will automatically get added to the Question bank in Elentra. Only Admin users, Staff:PCoordinators, and Faculty:Directors have the ability to create exam in Elentra. Staff:PCoordinators and Faculty:Directors can only store exams in the folders for which they have been given permission.
To create an exam do the following:
Step 1: Navigate to Admin > Manage Exams.
Step 2: Click on Exams in the Manage Exams section from the sidebar on the left side of the page.
Step 3: Click Add Exam to create a new exam.

Step 4: Provide an Exam Name, select a folder and click Add Exam. You will then be directed to the exam question page where you will see an empty exam has been created. You can start adding questions and configuring the exam. From this view you will be able to set the exam settings, create and manage exam posts, adjust the scoring tab to be able to adjust the scoring after the exam has been taken, view exam reports, and see the the history of who has made changes to the exam.


Information and Settings
If you'd like to add permissions to the newly created exam, you can do so under the Information and Settings tab for the exam. Note that an exam will automatically inherit the permission settings of the folder in which it is stored.
![]()
Add Questions to an Exam
-
To add existing questions, click 'Add Individual Question(s)'.
-
To create a new question while creating an exam, click 'Add Individual Question(s)', then click the down arrow beside 'Attach Selected' and choose 'Add and Attach New Question'.
-
-
Create your question (see instructions for creating questions in another section) and save it. This will add the new question to the exam and create a new entry in the Questions folders.
-
Add Existing Grouped Questions

There are two ways to add a Grouped Q to an exam.
-
Click on the chain icon from the screen you see above and you'll be prompted to add the grouped item to the exam. If a question is part of two different groups you'll be able to preview the questions in each group and select the one you want

-
Click on the checkbox beside an individual question to add it to the exam as you normally would. After that individual question has been added to the exam, click on the chain icon and you will be prompted to either click the group title to view additional questions in the group, or click 'Replace with Group' to substitute the full group of questions for the single question already added.
Once a Grouped Q has been added to an exam remember that the questions will appear with a blue border around them.
.png?width=688&height=436&name=q3%20(1).png)
Add Free text or a page break
-
To add either option, click on the down arrow beside the ‘Add Individual Question(s)’ button.
-
Select the item you want to add by clicking on it.
Note that any text entered into a free text space must be saved by clicking the Save button within the free text card. Find the Save button in the top right of the free text item beside the eye icon.
Manage questions on an exam (group, reorder, delete and versioning)
-
To create a grouped question from an exam, click the checkbox beside each question you wish to include in the group, and then click on 'Question Actions'. Select 'Group Questions' and provide a group name when prompted and click 'Save'. Note that you can click an additional button in the popup window to add the selected questions to an existing question group. If you choose to do so, select the existing group from the dropdown menu and then click 'Save'. The questions you group together need to be stored in the same folder to successfully group them on the exam.
-
On an Exam Question page, grouped items will appear together with a blue border. Grouped questions will remain together, and in order, when an exam is posted, even if the other exam questions are randomized.
-
There are two ways to reorder questions on an exam. In the list view of questions you can also type in the desired question order in the second column, then click ‘Reorder’ to save your choices. In the card view of questions, click on the crossed arrows beside each question to drag and drop it to the desired location. Remember you will have the option to randomize the order of questions when an exam is delivered.
-
To delete questions from an exam before it has been posted, click the checkbox beside each question you wish to delete and then click on 'Question Actions'. Select 'Delete Questions' and the question(s) will be removed from the list.
![]()
Copy an Existing Exam
Preview, print, and export a Word version of an exam